License
The Release and Patch Management license is required for this connector. A limited version is available in the basic license, with setups for Adobe and Application Workspace.
Catalog information prefilled
If you configure the managed package to be published in the user's catalog, the following sections are prefilled: excerpt, description, media, details and website. For more information, see Packages.
Firewall
You must add liquit.blob.core.windows.net to your firewall allow list for the connector to work properly.
This connector type allows you to retrieve managed and unmanaged packages from the Application Workspace Setup Store Server and is a powerful solution for Release and Patch Management.
For more information about the Overview, Entitlements, Synchronization Profile, Releases and Managed packages screens, see Connectors.
Overview screen - Resources
In the menu of the Overview screen, if you select  Resources, you will see a list of all the applications available in the Application Workspace Setup Store Server with which you can create new managed packages in your own Application Workspace System.
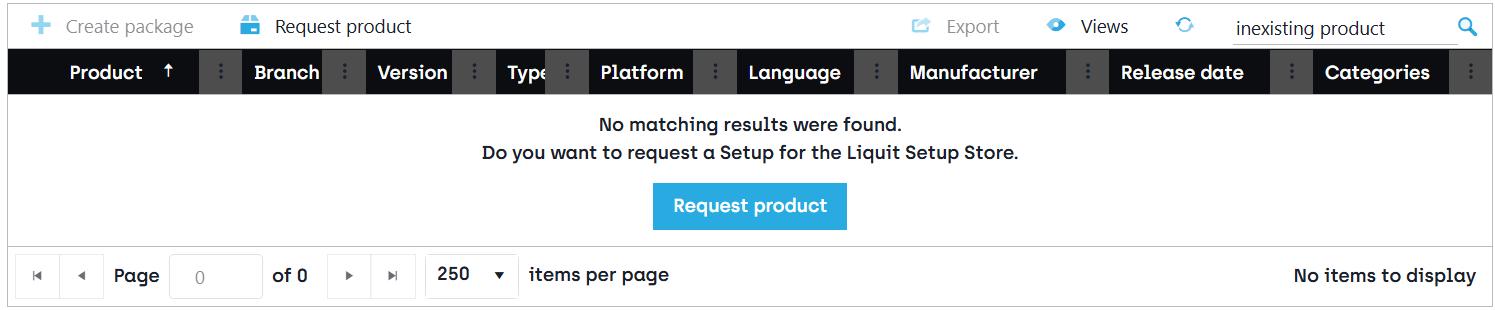
If you need an application added to the Application Workspace Setup Store, you can request the product by selecting the  Request product button in the grid’s toolbar. Alternatively, if you use the search box and it yields no results the following message will be shown in the grid, containing the request button:
Request product dialog box
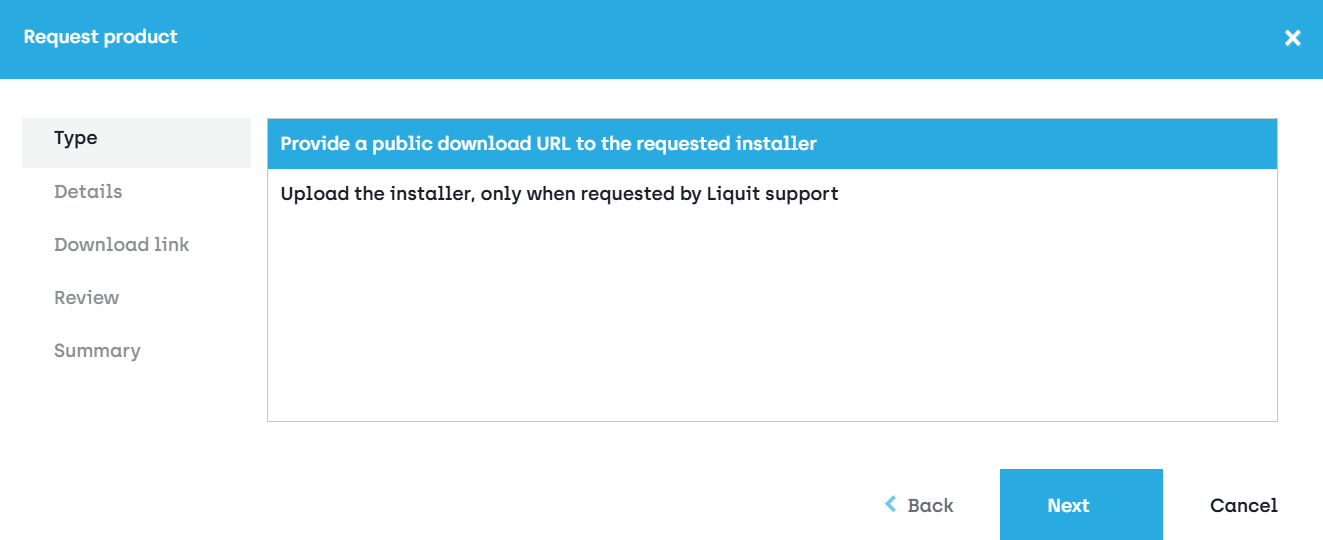
After you click Request product button in the grid’s toolbar, the following dialog box prompts you for information about the application you would like to see added to the Application Workspace Setup Store.
- First you need to select one of the two options.
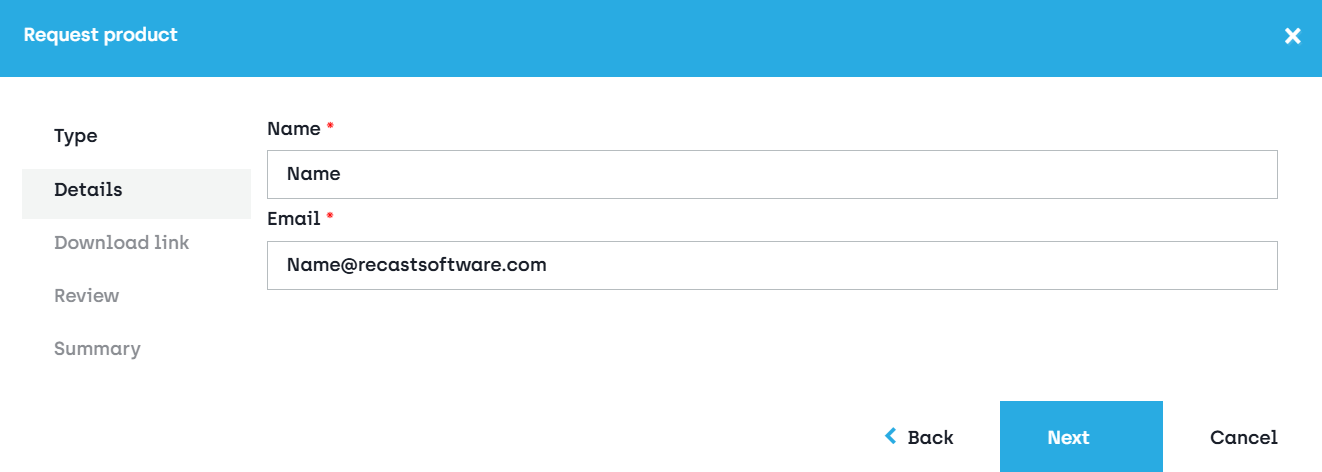
- In the next window, fill in the following information:
Name - Insert your full name.
Email - Insert your email address where Recast support can reach you for more information if needed.
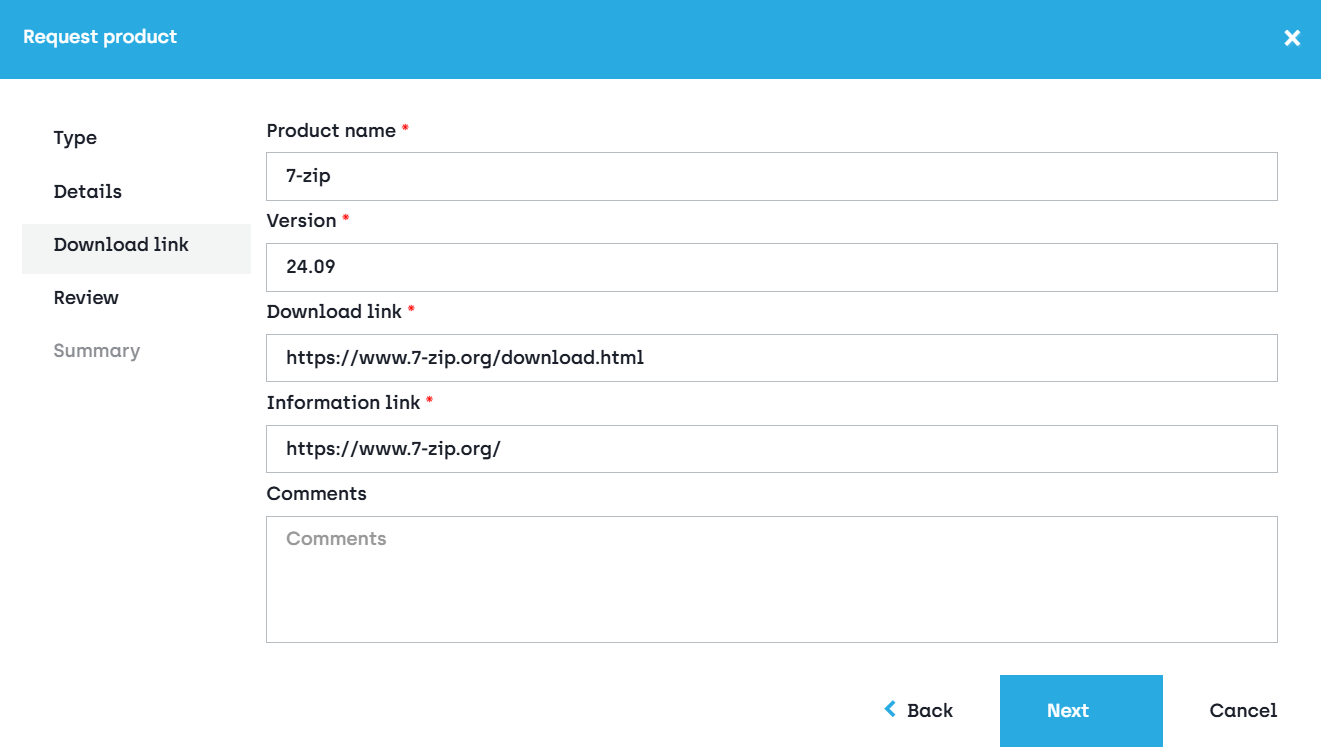
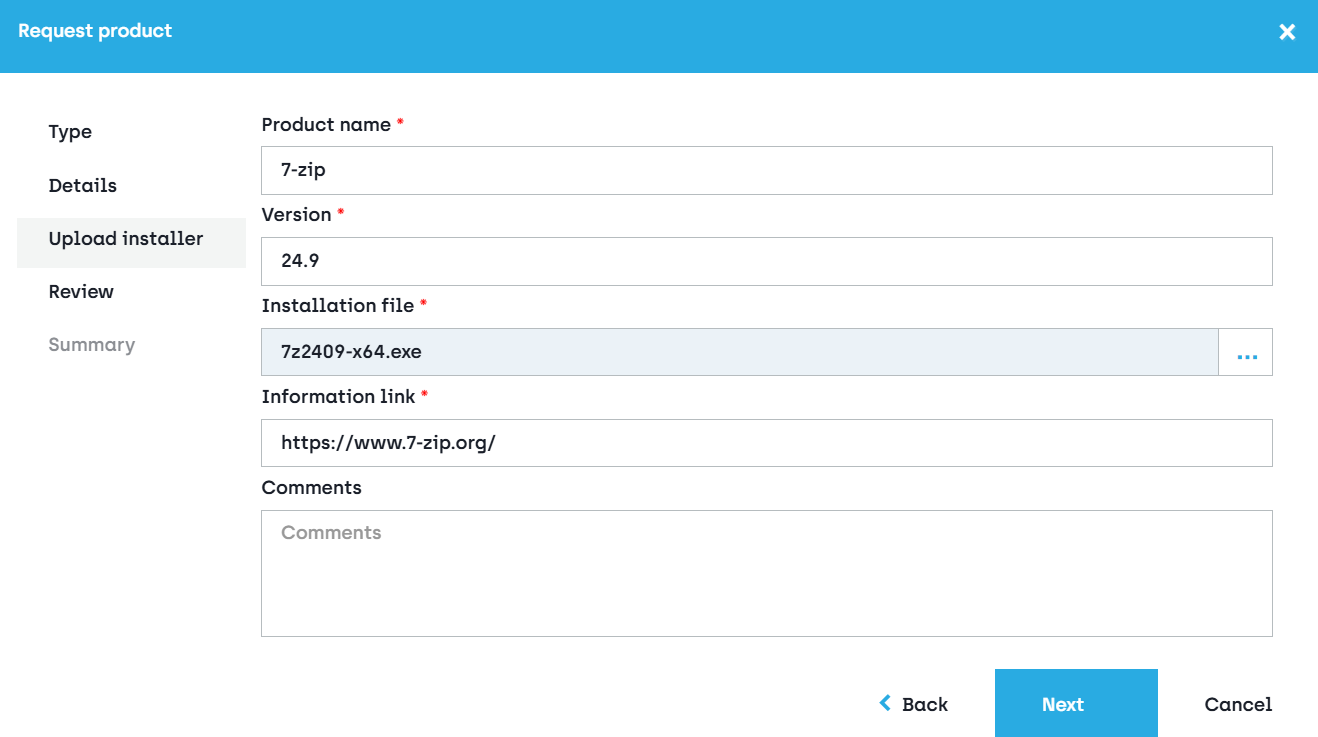
- In the next window, you have to either provide the URL to the installation file or upload it, depending on which option you chose at the beginning of the process.
Product name - Insert the name of the application you want added to the Application Workspace Setup Store.
Version - Insert the current version of the app.
Download link - Insert the link to the webpage that contains a download link for the setup.
Information link - Insert the link to a webpage with more information about the application.
Installation file - You can supply your version of the setup; this can be useful when no download link is available.
Comments - Add any additional information you can provide on the applications.
- In the next window, if Application Workspace detects that some relevant products already exist in the Application Workspace Setup Store, it will display them.
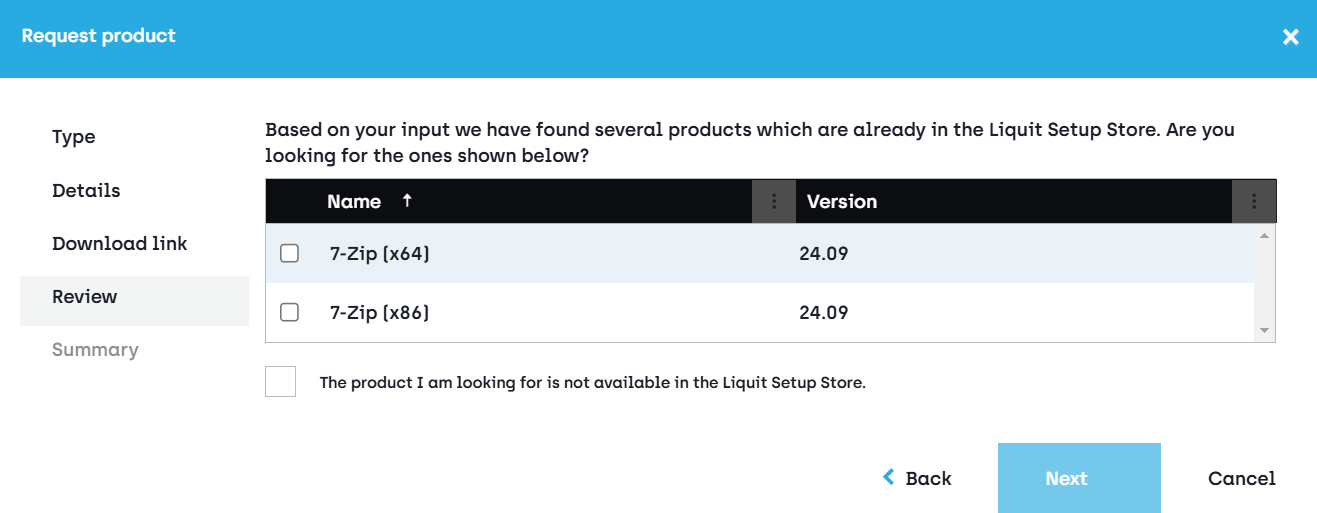
-
If you select one of the sugested products, a new package will be created, after you click Finish in the next window, Summary.
-
If you select the The product I am looking for is not available in the Application Workspace Setup Store checkbox, a new request will be created after you click Finish in the next window, Summary.
Settings screen
The settings screen allows you to select which kind of applications should be retrieved from the Application Workspace Setup Store:
Type of applications - The following types are available:
- Installers (MSI, MSIX, PKG etc.)
- Portable applications
- Shortcuts (SaaS, native applications etc.)
Directory for portable applications ($(PackageID) is required) - The directory of the local devices where the applications are installed.
Include install filters - Include installation detection filters on the Install action set.
Include uninstall actions - If enabled, uninstall actions are automatically included in the managed packages created through the Application Workspace Setup Store connector.
Include shortcuts - Include shortcut information
Shortcut types - Type of shortcuts you want to include within the packages. The following categories are available:
- Launch - Starts an application.
- Help - A shortcut to the online or on-premise help manual.
- Documentation - A URL of a website containing information relating to installation, usage, release notes or maintenance.
- License - A URL of a website where the user can buy a license or a shortcut that launches a local license agreement.
- Configure - Launches a configuration wizard, for example for server applications.
Platforms - Define which platform you want to target:
- Windows (x86) - 86-bit Windows applications will be fetched from the Application Workspace Setup Store.
- Windows (x64) - 64-bit Windows applications will be fetched from the Application Workspace Setup Store.
- macOS (x64) - 64-bit macOS applications will be fetched from the Application Workspace Setup Store.
- macOS (ARM64) - ARM64 macOS applications will be fetched from the Application Workspace Setup Store.
Languages - Define which localizations of the MSI you want to fetch.
Temporary directory used for installation and uninstallation actions - Insert a custom variable to override the ${PackageTempDir} variable that is always used for storing the download and installation files of applications.
Temporary directory used for logging installation and uninstallation actions - Insert a custom variable to override the ${PackageTempDir} variable that is always used for storing the installation logs.
Further reading
What is a managed app
How to create a managed package (Video)
Create a managed package using Application Workspace Setup Store connector
Update a managed package from Application Workspace Setup Store
Receive email notifications for Application Workspace Setup Store managed package updates
What is the difference between Application Workspace Setup Store and Microsoft connector regarding Microsoft apps
Upload your own config.xml within a Setup Store managed app
Enterprise Application Management: App Store Showdown