The information in this article is applicable only to devices with Windows OS and Bootstrapper 4.4.
The command lines and scripts in this article are just an example. When file names are specified, make sure you modify them accordingly before running the command/script.
Instead of manually converting multiple apps that you need into .intunewin files and then uploading and configuring them individually in Microsoft Intune, you can just add the Application Workspace Agent Bootstrapper to Microsoft Intune and then deploy multiple apps at once.
The following step-by-step instructions will help you deploy the Application Workspace Agent Bootstrapper within Microsoft Intune.
Prerequisites
Create an Entra ID identity source. For more information, see Microsoft Entra ID.
Application Workspace configurations
Create a self-signed certificate
- In Application Workspace, navigate to Manage > System > Device Registrations.
- Click on
 Create in the table toolbar.
 - In the Create device registration dialog box that opens, configure the following:
- In Type, select Certificate and click Next.
- In Overview, write a name, for example Device enrollment and click Next.
- In Settings, check the Use a self signed certificate for the device registration option. This will create a self-signed certificate for you. Click Next.
- In Self signed, write a common name and change the days valid and key size if needed. Click Next.
- In Summary, leave the Modify device registration after creation option selected. Click Finish.
- In the newly created certificate that opens, navigate to the Settings screen and click Download for agent registration. You need to save this file as you will use it when creating the .intunewin file that you will later upload to Intune.
Create a deployment
- In Application Workspace, navigate to Manage > Automation > Deployments.
- Click on Create in the table toolbar.
- In the Create deployment dialog box that opens, configure the following:
- Enter the desired name and description and click Next.
- In Summary, leave the Modify deployment after creation selected.
- In the detailed view of the new deployment, configure the following:
- In Packages, use the lookup field or the browse button
 to select the packages you want to deploy. Be sure to specify the Install action.
 - In Assignments, use the lookup field or the browse button and select an existing device collection for a targeted deployment or the All devices predefined collection to deploy to all devices.
- In Packages, use the lookup field or the browse button
Create a Temp folder for storing files necessary for Microsoft Intune
- Create a folder on
Local Disk (C:)to store all the files required to create an .intunewin file for Microsoft Intune:- The self-signed certificate you downloaded before from Application Workspace.
- The latest version of the bootstrapper.
- (Optional) If there are specific settings that cannot be handled by the bootstrapper, you should create an Agent.json file and add it to this folder. If you don't, the bootstrapper creates one for you during deployment. The objects that you can configure in the command line are Zone, Registration and Deployments (except for cancel, trigger, zoneTimeout). You can specify command lines for the bootstrapper in Intune, as explained later in this article.
Agent.json file example
Make sure that the Agent.json is formatted as UTF-8.
{
 "zone": "https://company.liquit.com/ ",
 "promptZone": "Disabled",
 "registration": { "type": "Certificate" },
 "log": { "level": "Info" },
 "deployment": {
 "enabled": true,
 "start": true,
 "context": "device",
 "cancel": true,
 "triggers": false,
 "autoStart": {
 "enabled": true,
 "deployment": "Deployment",
 "timer": 0
 }
 },
 "login": {
 "enabled": true,
 "sso": true,
 "identitySource": "Microsoft Entra ID",
 "timeout": 4
 },
 "icon": {
 "enabled": true,
 "exit": false,
 "timeout": 30
 },
 "launcher": {
 "enabled": true,
 "state": "Default",
 "start": "Auto",
 "tiles": true,
 "minimal": false,
 "contextMenu": true,
 "sideMenu": "Tags",
 "close": true
 },
 "nativeIcons": {
 "enabled": true,
 "primary": true,
 "startMenuPath": "${Programs}\\Liquit"
 },
 "restrictZones": true,
 "trustedZones": ["company.liquit.com "]
}
Microsoft Intune configurations
Download IntuneWinAppUtil
Download the latest version of IntuneWinAppUtil to a folder different than C:\Temp\Liquit, otherwise it will be included in the .intunewin file later on.
Prepare the .intunewin file for Microsoft Intune
- Start IntuneWinAppUtil.exe as Administrator.
- Inside the tool, navigate to
C:\Temp\Liquit. Press the Enter key on your keyboard. - Then specify the AgentBootstrapper file. Press the Enter key on your keyboard.
- Then specify a name for the output folder. For example
C:\Temp\Output. Press the Enter key on your keyboard. - When prompted for the catalog folder, press the N key and then the Enter key on your keyboard.
- After the bootstrapper has run, navigate to the output folder to find the .intunewin file.
Upload the .intunewin file to Microsoft Intune
1. Go to Microsoft Intune admin center.
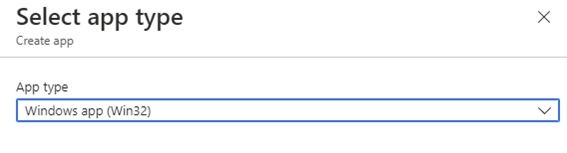
2. Select Apps > By platform > Windows > + Create.
3. On the Select app type pane that opens, under the Other app types, select Windows app (Win32) and then click Select.
4. On the App information page click Select app package file.
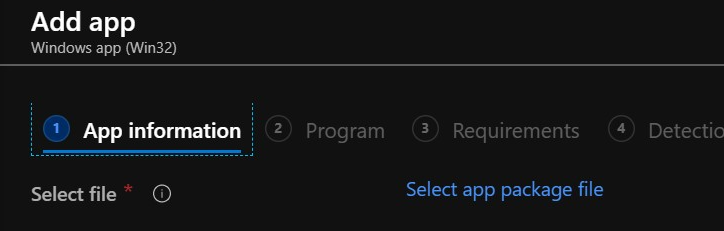
5. The Add package file page opens where you upload the .intunewin file you previously prepared in Prepare the .intunewin file for Microsoft Intune, step 6. After you finish and click OK, you can see that Intune already filled in some of the app info. Once you finish filling in all the necessary details, click Next.
6. On the Program page, configure the following:
- the install command (see Application Workspace Agent Bootstrapper 4.4). For example:
Bootstrapper.exe --zone "https://my.zone.com/" --startDeployment --deviceDeployment --registrationType Certificate --certificate "AgentRegistration.cer" --wait
or
Bootstrapper.exe --zone "https://my.zone.com/" --startDeployment --deviceDeployment --registrationType Credentials --registrationUsername "exampleUser" --registrationPassword "examplePass"``` --wait
- the uninstall command, for example
Bootstrapper.exe --uninstall - the log path, for example
--logPath "C:\Windows\Temp ", to easily identify any errors in the process. If you do not specify a path, the current working directory will be used. - After you finish specifying the desired command, click Next.
- On the Requirements page, select the 32 and 64-bit operating system architectures and the minimum operating system. Click Next.
- On the Detection rules page, add your custom detection script for the Agent. For example:
# Define an array of file paths to check
$filePaths = @(
 "C:\Program Files\Liquit Universal Agent\Agent.exe",
 "C:\Program Files (x86)\Liquit Universal Agent\Agent.exe",
 "C:\Program Files (x86)\Liquit Workspace\Agent\Agent.exe"
)

# Loop through each file path and check if it exists
foreach ($path in $filePaths) {
 if (Test-Path $path) {
 Write-Host ("Application Workspace is installed at " + $Path)
 Exit 0
 }
}
Write-Host ("Application Workspace is not installed!")
Exit 1
If you signed the script, you can enable the option Enforce script signature check and run script silently to run the script silently.
9. On the Dependencies and Supersedence pages click Next.
10. On the Assignments page, assign it to devices, users or groups as needed. Click Next.
11. On Review + create page, review the values and settings that you entered for the app. Click Create to add the bootstrapper to Microsoft Intune.
Reboot
The device requires a reboot after the initial configuration. Until the deployment becomes inactive, the Application Workspace Agent service is disabled, and the Application Workspace Launcher is not available.