The information in this article is applicable only to devices with Windows OS and Bootstrapper 2.1
Instead of manually converting multiple apps that you need into .intunewin files and then upload and configure them individually in Microsoft Intune, you can just add the Application Workspace Agent Bootstrapper to Microsoft Intune and then deploy multiple apps at once.
Currently, there is no possibility to enrol a machine running the Recast Agent with Microsoft Intune, because you cannot add the Application Workspace configuration file. There are only two ways to integrate Recast with Microsoft Intune: either by adding the Application Workspace Agent Bootstrapper within Microsoft Intune, or creating a Bootstrapper script.
The following step-by-step instructions will help you deploy the bootstrapper within Microsoft Intune.
Application Workspace configurations
Create a self-signed certificate
- In Application Workspace, navigate to Manage > System > Device Registrations.
- Click on
 Create in the table toolbar.
 - In the Create device registration dialog box that opens, configure the following:
- In Type, select Certificate* and click Next.
- In Overview, write a name, for example Device enrollment and click Next.
- In Settings, check the Use a self signed certificate for the device registration option. This will create a self-signed certificate for you. Click Next.
- In Self signed, write a common name and change the days valid and key size if needed. Click Next.
- In Summary, uncheck the Modify device registration after creation option. Click Finish.
Create a device collection
- In Application Workspace, navigate to Manage > Identities > Device Collections.
- Click on Create in the table toolbar.
- In the Create device collection dialog box that opens, configure the following:
- In Type, select Dynamic and click Next.
- In Overview, write a name, for example MS Intune Devices and click Next.
- In Summary, leave the Modify device registration after creation option checked. Click Finish.
- In the detailed view of the new device collection, configure the following:
- In Conditions, click Create filter set in the screen top menu. Then click Create filter.
- In the Create filter dialog box that opens, configure the following:
- In Type, select Device name.
- In Value, insert the prefix your organization uses within Microsoft Intune.
- Click Confirm.
- Leave the operator set to AND. Create a new filter in the new filter set, with the following parameters:
- In Type, select System manufacturer.
- In Value, insert the system manufacturer your organization uses.
- Click Confirm.
- Create a new filter in the new filter set, with the following parameters:
- In Type, select System model.
- In Value, insert the system model your organization uses.
- Click Confirm.
- Click Save in the top menu of the Conditions screen.
- In Conditions, click
Create a deployment
- In Application Workspace, navigate to Manage > Automation > Deployments.
- Click on Create in the table toolbar.
- In the Create deployment dialog box that opens, configure the following:
- In Name, write MS Intune Deployment. Click Next and then Finish.
- In the detailed view of the new deployment, configure the following:
- In Packages, click on the browse button
 and select the packages you want to deploy.
 - In Assignments, click on the browse button and select the MS Intune Devices device collection you previously created. Click Confirm.
- In Packages, click on the browse button
Configure the Agent required for Microsoft Intune
- Open Windows File Explorer and navigate to
Local Disk (C:). - Open the Temp folder. If it's not there, create one. You will use this folder to store all the required files.
- Create a new folder named Recast.
- Inside it, create a JSON file named
Agent.json.
- Inside it, create a JSON file named
- Open the JSON file and create your own settings based on the information we provide in Agent Configuration.
- See Agent Configuration for the Liquit Workspace Agent or Agent Configuration for Application Workspace Agent for more information on creating an Agent configuration file.
It is important to have the following settings configured:
- The device must be configured to register itself with credentials or certificate, depending on the type of the Agent.
- Context set to Device.
- Deployment.Autostart.Enabled set to true.
- Deployment.Enabled set to true.
- Deployment.Start set to false. The deployment start must be false because the bootstrapper and the installer will automatically trigger the deployment.
If you run the installer without the bootstrapper remember to set these flags correctly.
Agent.XML example
<Register>
    <Type>1</Type>
    <Username><![CDATA[LOCAL\wksimport]]></Username>
    <Password><![CDATA[P@ssw0rd]]></Password>
</Register>
<Deployment>
    <Enabled>True</Enabled>
    <Start>False</Start>
    <Cancel>False</Cancel>
    <Events>False</Events>
    <Context>Device</Context>
    <AutoStart>
        <Enabled>True</Enabled>
        <Timer>0</Timer>
        <Deployment>RecastSoftware</Deployment>
    </AutoStart>
</Deployment>
Agent.JSON example
{
    "zone":"https://example.recastsoftware.com",
    "registration": {
        "type": "Certificate"
    },
    "log": {
        "level": "Debug"
    },
    "deployment": {
        "enabled": true,
        "start": false,
        "context": "device",
        "cancel": true,
        "triggers": false,
        "autoStart": {
            "enabled": true,
            "deployment": "RecastSoftware",
            "timer": 0
        }
    }
}
Microsoft Intune configurations
Download all the files required for Microsoft Intune
- Navigate to Manage > Device Registration and open the device registration you created earlier. In the detailed view of the registration navigate to Settings. Click on Download for agent registration. You will need this certificate later to create an intunewin file for Microsoft Intune.
- Download the latest version of the bootstrapper in the
C:\Temp\Liquitfolder you created previously. - Download the latest version of IntuneWinAppUtil. You should download it in a folder different than
C:\Temp\Liquitotherwise it will be included in the .intunewin file later on.
Prepare the .intunewin file for Microsoft Intune
- Start IntuneWinAppUtil.exe as Administrator
- Inside the tool, navigate to
C:\Temp\Liquit. Press the Enter key on your keyboard. - Then specify the AgentBootstrapper file. Press the Enter key on your keyboard.
- Then specify a name for the output folder. For example
C:\Temp\Output. Press the Enter key on your keyboard. - When prompted for the catalog folder, press the N key on your keyboard and then press the Enter key on your keyboard.

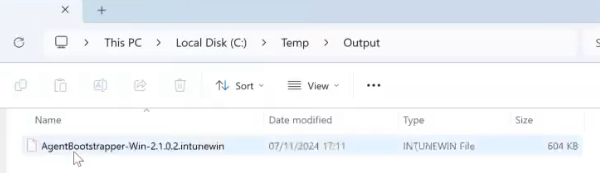
- After the bootstrapper has run, navigate to the output folder to find the .intunewin file.
Upload the .intunewin file to Microsoft Intune
- Go to Microsoft Intune admin center.
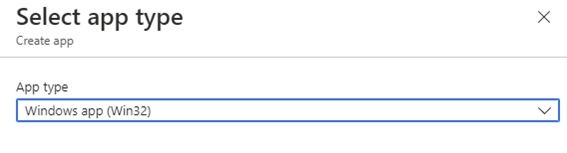
- Select Apps > By platform > Windows > + Create.
- On the Select app type pane that opens, under the Other app types, select Windows app (Win32) and then click Select.
- On the App information page click Select app package file.
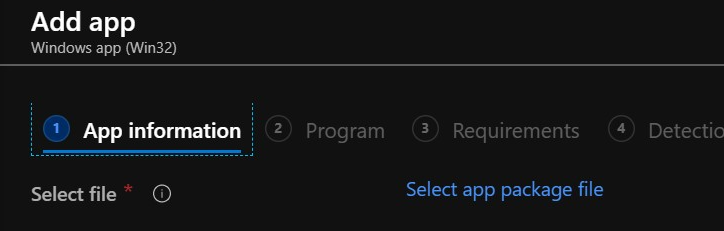
- The Add package file page opens where you upload the .intunewin file you previously prepared in Prepare the .intunewin file for Microsoft Intune, step 6. After you finish and click OK you can see that Intune already filled in some of the app info. Once you finish filling in all the necessary details, click Next.
- On the Program page, configure the following:
- the install command (see Application Workspace Agent Bootstrapper 2.1.0.2. For example:
AgentBootstrapper-Win-2.1.0.2.exe /startDeployment /waitForDeployment /logPath=C:\Windows\Temp
If you’re using a certificate to register, specify the name and path. (/certificate="path/to/file.cer"). For more information, see Application Workspace Agent Bootstrapper 2.1.0.2.
If you want to deploy a Liquit Workspace Agent and not the Application Workspace Agent, specify the/legacyDownloadparameter. This is for the 3.10 agent or pre-4.0 servers. - the uninstall command, for example
AgentBootstrapper-Win-2.1.0.2.exe /uninstall - After you finish specifying the desired command, click Next.
- the install command (see Application Workspace Agent Bootstrapper 2.1.0.2. For example:
- On the Requirements page, Select the 32 and 64-bit operating system architectures and the minimum operating system. Click Next.
- On the Detection rules page, add your custom detection script for the Agent. For example:
# Define an array of file paths to check
$filePaths = @(
    "C:\Program Files\Liquit Universal Agent\Agent.exe",
    "C:\Program Files (x86)\Liquit Universal Agent\Agent.exe",
    "C:\Program Files (x86)\Liquit Workspace\Agent\Agent.exe"
)

# Loop through each file path and check if it exists
foreach ($path in $filePaths) {
    if (Test-Path $path) {
        Write-Host ("Application Workspace is installed at " + $Path)
        Exit 0
    }
}
Write-Host ("Application Workspace is not installed!")
Exit 1
If you signed the script, you can enable the option Enforce script signature check and run script silently to run the script silently.
- On the Dependencies and Supersedence pages click Next.
- On the Assignments page, assign it to devices, users or groups as needed. Click Next.
- On Review + create page, review the values and settings that you entered for the app. Click Create to add the bootstrapper to Microsoft Intune.
Autopilot Enrollment Status Page
During the Device setup stage in the Autopilot ESP the Recast Agent will be installed, registered and then the deployment will start automatically,
On our YouTube channel, you can find a video of the entire walkthrough.