This article will guide you through the process of setting up a VMware Horizon environment with Unified Access Gateway and True SSO in place.
The SAML identity provider is available only with a valid Access Manager license. We recommend you contact Recast Sales if the option is not available in your Application Workspace System.
Create an Application Workspace Self signed certificate
First, we need a self-signed certificate to sign the SAML 2.0 message that the Application Workspace identity provider will issue.
- Navigate to Manage > System > Certificate and click
 Create in the table toolbar.
 - In the Create certificate dialog box:
- In Type, select Self signed and click Next.
- In Overview, enter a description like “Signing certificate for SAML IDP” and click Next.
- In Self signed, for the Common name field, the domain name does not need to be a valid one. A common name like "SAML-IDP-SIGNING" should be sufficient in most situations. In the Days valid and Key size fields leave the default values.
Create an Application Workspace SAML 2.0 identity provider
Now we can create a new identity provider:
- Navigate to Manage > Authentication > Identity Providers and click Create in the table toolbar.
- In the Create identity provider dialog box:
- In Type, select SAML 2.0 and click Next.
- In Overview, give your SAML 2.0 IdP a name (e.g., SAML Identity Provider, this name is only used within the Application Workspace UI) and a description and click Next.
- In Summary, leave the checkbox Modify identity provider after creation selected and click Finish.
- Navigate to the Settings screen and configure the following:
- Certificate used for signing SAML messages: select the SAML-IDP-SIGNING created previously, or another appropriate certificate.
- Enable Allow requesting metadata.
- Download the Metadata URL as you will need it later.
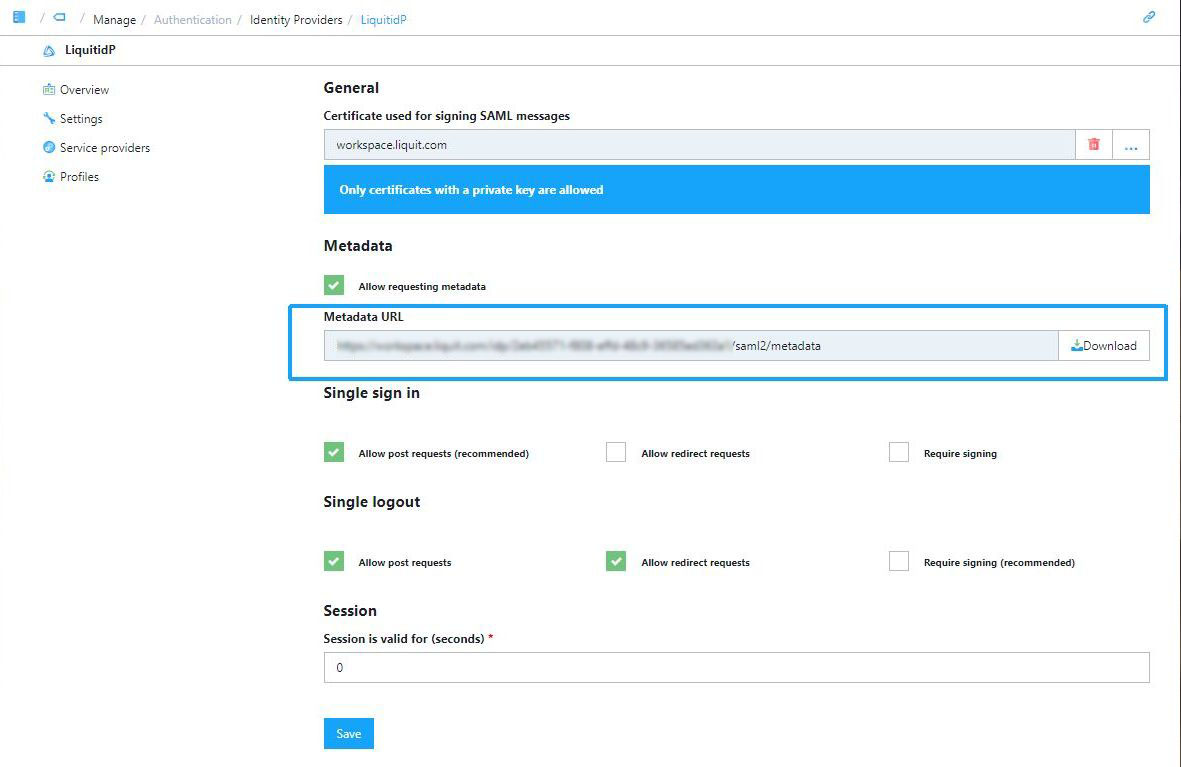
* In the Single sign in section enable Allow post requests.
* In the Single logout section enable Allow redirect requests.
For security purposes, we recommend you have the options Require signing enabled.
For more information, see SAML 2.0.
Add Application Workspace SAML identity provider to Unified Access Gateway
-
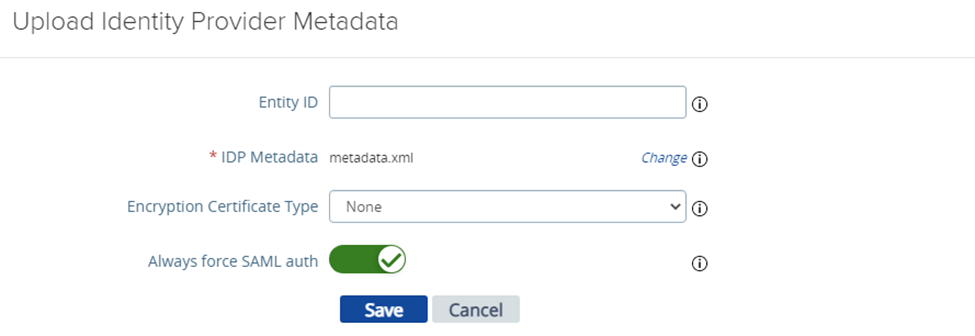
Log into the Unified Access Gateway administration console and under the section Identity Bridging Settings, select the Upload Identity Provider Metadata option.

-
In the window that opens, select the Application Workspace SAML IdP metadata file you downloaded from Application Workspace at step 3 in Create an Application Workspace SAML 2.0 identity provider.
-
Enable the Always force SAML auth. Click Save.
-
Navigate to Edge Service Settings > Horizon Settings.

-
Click More at the bottom of the settings page and configure the following:
- Auth Methods: SAML
- Identity Provider: select the Application Workspace SAML identity provider you previously created
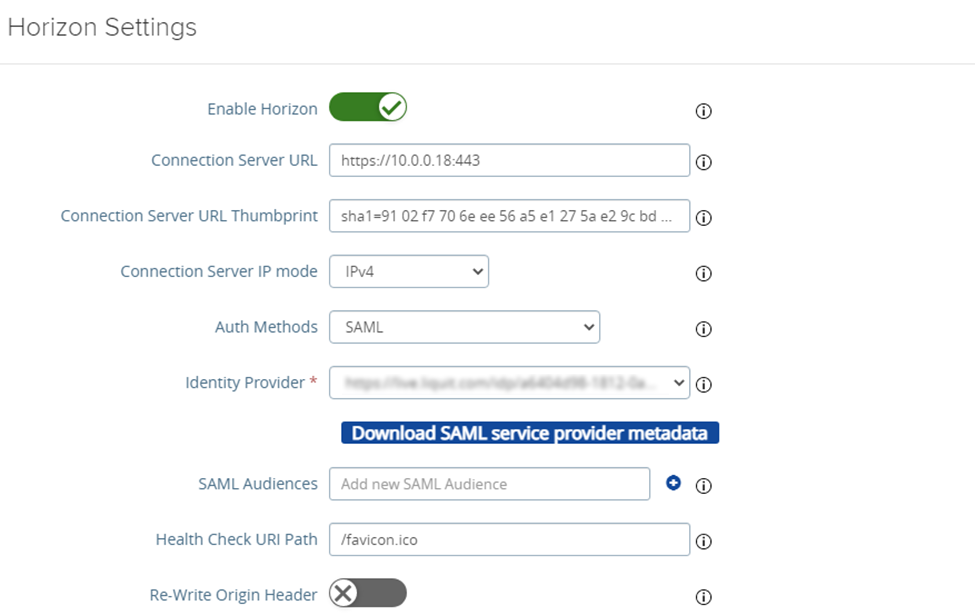
- Click Download SAML service provider metadata. In the pop-up make sure the correct IdP is selected and enter the external hostname (not URL) of the Unified Access Gateway. Download the service provider metadata and save it for later.

Application Workspace service provider configuration
- In the Application Workspace, navigate to the identity provider you previously created and open it.
- Navigate to the Service providers screen and click Create service provider.
- In the dialog box that opens, configure the following:
- In Type, select Import Service provider from Metadata and click Next.
- In General, enter a descriptive name, like “VMware UAG”. Select File as the source and upload the VMware UAG SAML metadata you downloaded at step 6 in Add Application Workspace SAML identity provider to Unified Access Gateway.
- In Summary, leave the checkbox Modify service provider after creation selected and click Finish.
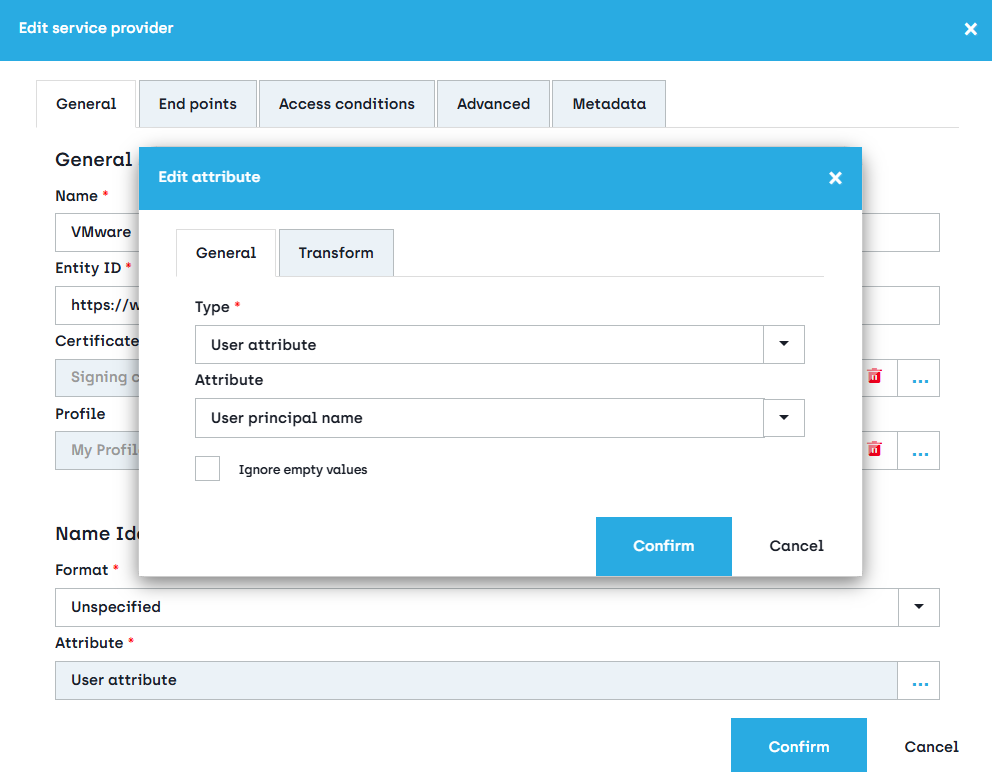
- In the Edit service provider dialog box that opens, in the General tab, under Name Identifier configure:
- Format: Unspecified
- Attribute: click on the browse button
 . In the Edit attribute dialog box that opens, select Type - User attribute and Attribute - User principal name
VMware Horizon – Connection Server configuration
-
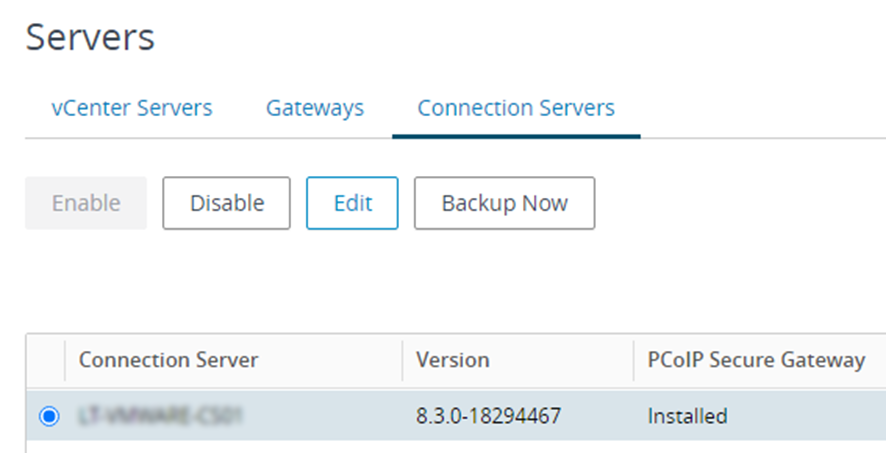
Log into the VMware Horizon administration console and navigate to Settings > Servers > Connection Servers.
-
Select the desired connection server and click Edit.
-
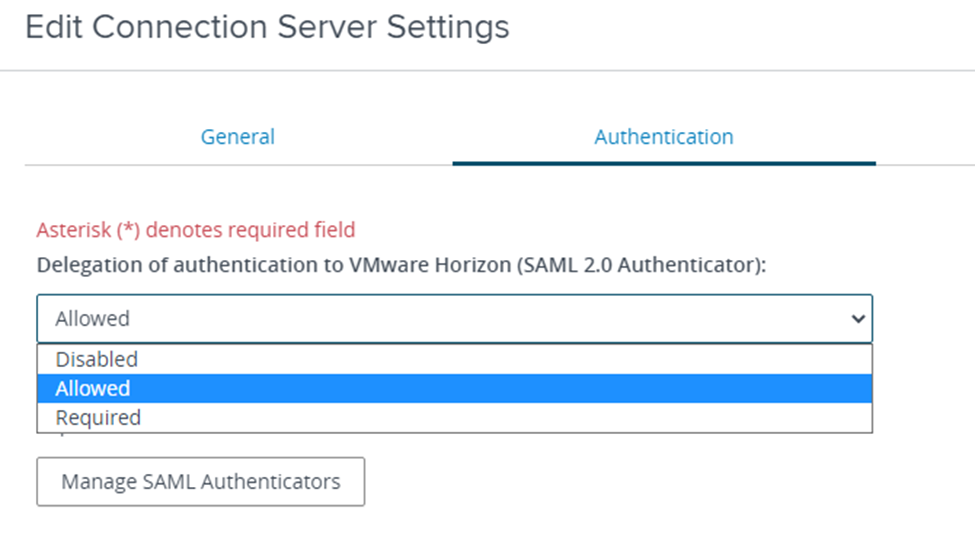
Navigate to the Authentication tab. Make sure that Delegation of authentication is set to Allowed. Click Manage SAML Authenticators.
-
Add a new authenticator with the following settings:
- Type: Static
- SAML Metadata: insert the Application Workspace SAML IdP metadata you downloaded from Application Workspace at step 3 in Create an Application Workspace SAML 2.0 identity provider.
- Select the Enable for Connection Server checkbox.

-
Save all dialogs by clicking OK in each of them.
Create SSO link to VMware
If you like to start Horizon applications or desktops with SSO, you need a specifically crafted link. There are two options to do this, both described below.
Native client link
The Native client launches the local VMware client and requires the Application Workspace Agent to be installed.
The syntax of application and desktop pool links is:
https://<public UGA url>/portal/nativeclient/<pool name>?action=start-session&desktopProtocol=BLAST
pool name - The name of the Desktop Pool or Application pool. The pool name needs to be encoded, you can use various websites to encode the pool name. For example this tool
desktopProtocol - it can be BLAST, RDP, PC over IP (PCOIP)
Example:
https://vmware.recastsoftware.com/portal/nativeclient/RecastSoftware-Desktop?action=start-session&desktopProtocol=BLAST
Web client link
The Web client opens the application or desktop in a webpage and does not require a VMware client or the Application Workspace Agent to be installed.
Just like native client links, the web links are constructed similarly.
https://<public UGA url>/portal/webclient/index.html?<type>=<pool name>
type - Takes one of two values: desktopName or applicationName.
pool name - The name of the Desktop Pool or Application pool. The pool name needs to be encoded, you can various websites to encode the pool name. For example: https://meyerweb.com/eric/tools/dencoder/
Examples:
https://vmware.recastsoftware.com/portal/webclient/index.html?applicationName=Notepad
https://vmware.recastsoftware.com/portal/webclient/index.html?desktopName=RecastSoftware-Desktop