There are two ways in which you can update a managed package, manually and automatically.
In this article, we take as an example Mozilla Firefox, a managed package created from the Application Workspace Setup Store. Application Workspace Setup Store is configured with he on-demand synchronization method, the only one supported.
Manual update
- Open the Mozilla Firefox package and navigate to Overview >
 Updates
 - Select the new version of Mozilla Firefox and click
 Apply update in the table toolbar.
Automatic update
Configure the e-mail settings
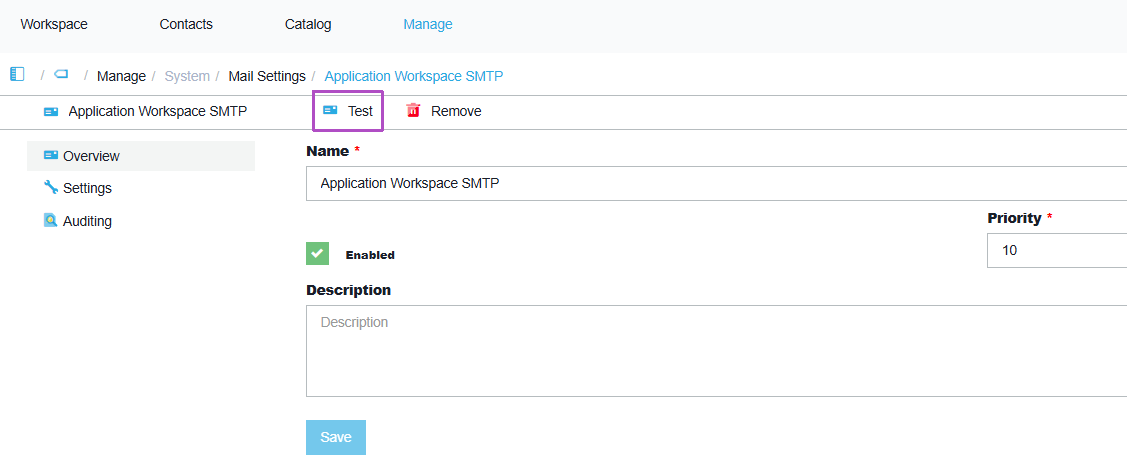
To receive e-mail notifications from within Application Workspace, you first have to add an email server in Manage > Mail Settings:
Click Create in the table toolbar and configure all the necessary settings for this email server.
This email server is used by the scheduled tasks to send email messages. For more information, see Mail Settings.
Don’t forget to use the Test option in the Overview screen, to see if the configuration is working correctly.
Create a scheduled task
- Navigate to Manage > Automation > Scheduled Tasks.
- Click Create.
- In the Create scheduled task that opens select the Synchronize connector type.
- In Settings:
- Select an existing Application Workspace Setup Store.
- Select Download and apply updates action
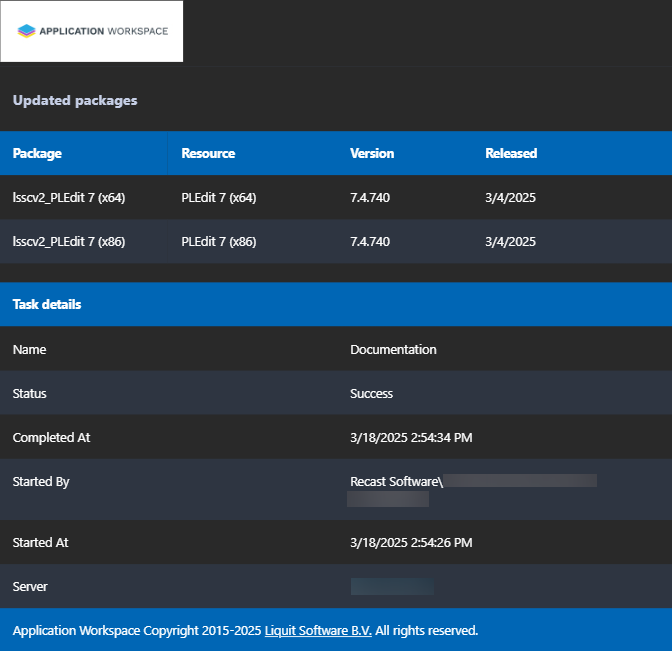
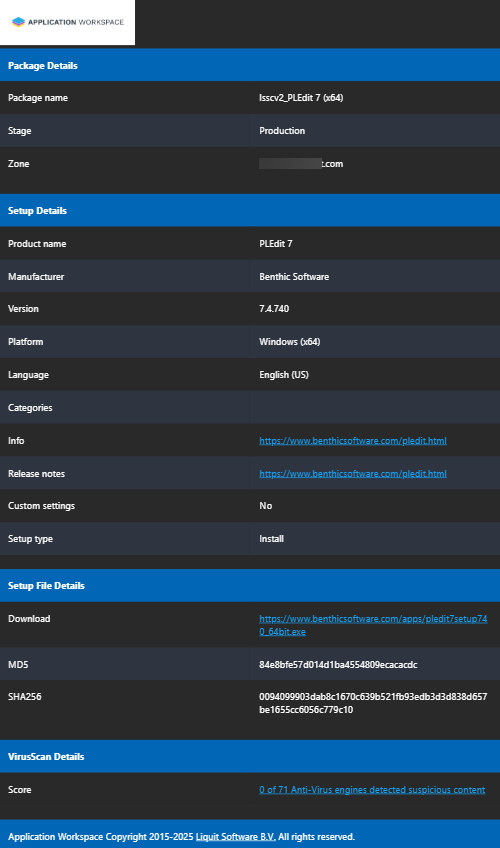
- Enable Send detailed per package notifications. By using this option you will receive, per managed package, a very detailed email message in which all kind of information of an update is included. Information like release notes, but also CVE and CVSS information (if applicable) and the virus scan score. The last one is very important for risk mitigation, to determine whether it's safe to deploy the update.
- Select to which DTAP stage you want to deploy the updated package. Note that the default option represents the stage you configure in the Releases screen of the connector.
- In Summary, leave the Modify package after creation selected and click Finish.
- Navigate to Notifications and enable the notification and add one or more email addresses where you want Application Workspace to send detailed emails per managed package.
- Navigate to Schedule and add a new schedule where you specify the desired frequency and time.
This is an example of how the email notification looks like when an automatic update is applied: