Since the introduction of identity providers in the Application Workspace, it has become possible to use SAML federation with the Citrix StoreFront.
In this scenario:
- Citrix Federated Authentication Services (FAS) is deployed and configured.
- Citrix Application Delivery Controller (ADC) is not used or it only functions as a pass-through (reverse proxy) without any intelligence (no ICA acceleration for example). In case Citrix ADC is used, and is handling authentication, see Scenario 4 StoreFront via ADC SAML integration.
Prerequisites
- Application Workspace 3.2 or later
- Citrix XenApp/XenDesktop 7.9 or later
- Citrix StoreFront connector must be configured
- Citrix Federated Authentication Service must be deployed and configured
- The SAML identity provider must be configured on the Application Workspace Server
- The public certificate of the Application Workspace SAML identity provider must be exported as base 64
The SAML identity provider is available only with a valid Access Manager license. We recommend you contact Recast Sales if the option is not available in your Application Workspace System.
Configure the Citrix StoreFront for SAML
Citrix StoreFront does not support importing SAML identity provider metadata, therefore the configuration needs to be done manually in it.
- In the Citrix StoreFront store, navigate to Manage Authentication Methods.
- Enable the SAML Authentication method. If it is not listed, click Advanced at the bottom of the dialog, select Install or uninstall authentication methods” and then select SAML Authentication
- Click on the gear icon of the SAML Authentication method and select Identity Provider.
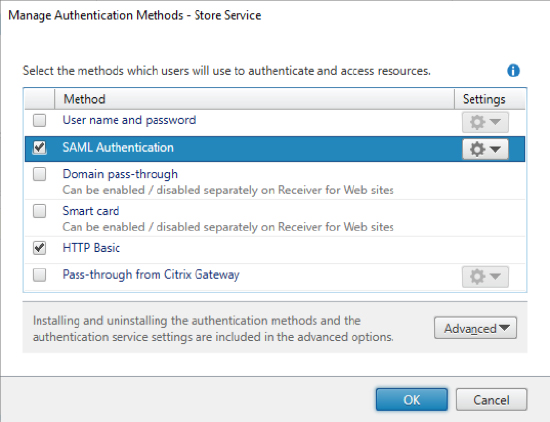
In this screenshot, the Application Workspace StoreFront connector is using the HTTP Basic authentication.
- Configure the following parameters
- SAML Binding: Post
- Address: Use the entity ID of the Application Workspace SAML identity provider followed by “sso” (for example: https://workspace.recastsoftware.com/idp/xxxxxxxx-xxxx-xxxx-xxxx-xxxxxxxxxxxx/saml2/sso)
- Click “Import…” at the bottom of the dialog and select the Application Workspace SAML identity provider public certificate.
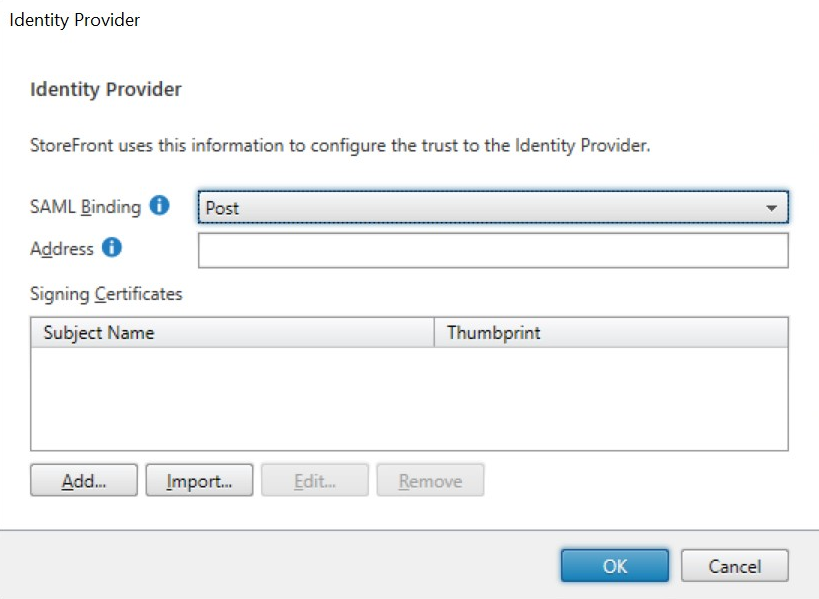
- Click OK to save changes.
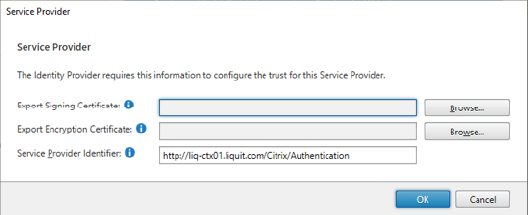
- After closing the dialog, click again on the gear icon of the SAML Authentication method and this time select Service Provider.
- Note down the “Service Provider Identifier” as you need this in the next step to register the StoreFront SAML Service Provider in the Application Workspace.
Register the StoreFront SAML Service Provider in the Application Workspace
- In the Application Workspace, navigate to Manage > Authentication > Identity Providers and open the desired SAML identity provider.
- Navigate to the Service Providers screen and click Create service provider.
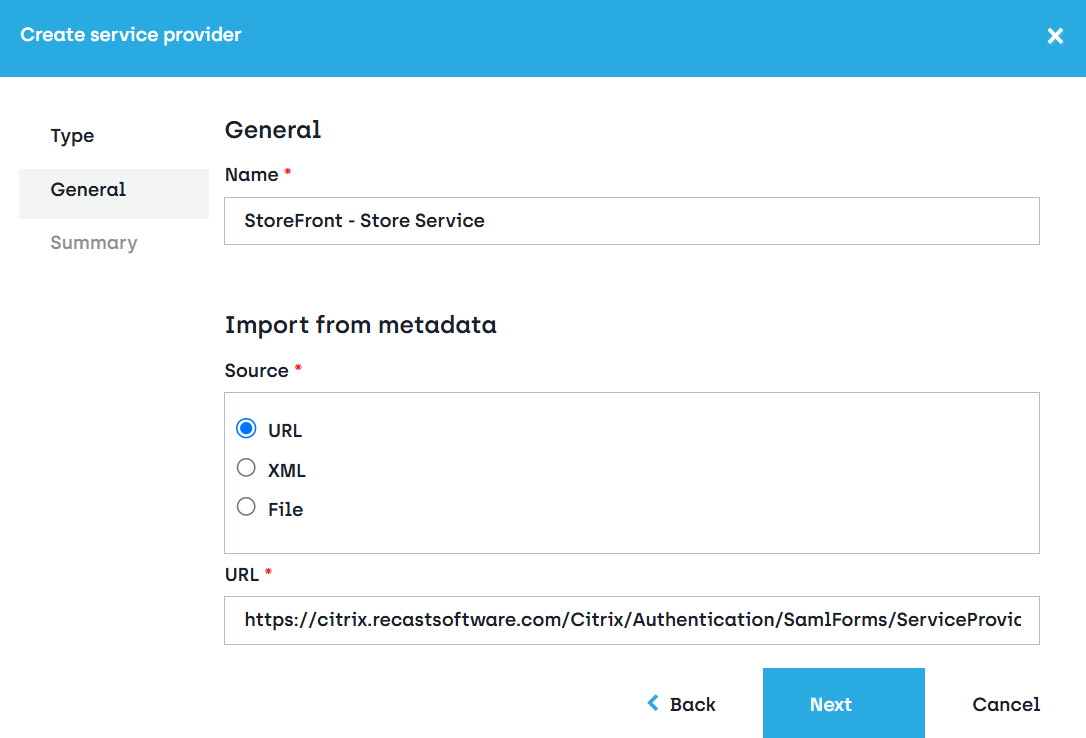
- In Type, select Import Service provider from Metadata.
- In General, provide a name to identify the new service provider later, for example “StoreFront - Store Service”. Specify the metadata URL using the URL that was noted down from the StoreFront Service Provider dialog:
- Change the URL schema to “https” if the StoreFront server is configured for SSL.
- Verify that the domain name is reachable from the Application Workspace (it could be that the domain name needs to be changed from server name to public DNS name).
- Append “/SamlForms/ServiceProvider/Metadata” to the end of the URL.
After that, the URL should for example look like this:
https://citrix.recastsoftware.com/Citrix/Authentication/SamlForms/ServiceProvider/Metadata
/Citrix/Authentication is only used for the default store, new stores will have a URL path like /Citrix/[Store name]Auth, for example https://citrix.recastsoftware.com/Citrix/DemoAuth/SamlForms/ServiceProvider/Metadata.
- In Summary, leave the checkbox Modify Service Provider after creation selected. The service provider entry will be created and populated with the information that could be found in the metadata.
- Configure the name identifier on the server provider as follows:
• Name Identifier: Persistent
• User attribute: User principal name
Alternatively, you can provide the metadata xml by specifying in the creation wizard the source "XML".