How to create an Adobe app using Adobe Creative Cloud Packager and Setup Commander for versions prior to 2019
Adobe apps and updates for versions of Adobe Creative Cloud earlier than 2019 are deployed via Creative Cloud Packager.
With the Creative Cloud Packager, you create Windows and/or Mac OS packages (MSI or PKG files) and then with MDT you deploy them to client machines in your organization.
Creative Cloud Packager Download
If you are a Creative Cloud for Teams customer, download the Adobe Creative Cloud Packager from the Team Admin Portal in Adobe Creative Cloud.
If you are a Creative Cloud for Enterprise customer, download the Adobe Creative Cloud Packager from the Adobe Licensing Website (LWS) or Enterprise Dashboard. You also get your enterprise license key from the LWS.
Creative Cloud Packager Installation
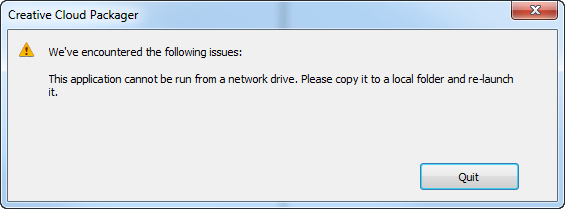
- Start the Creative Cloud Packager (as Administrator) from a local drive, since it can’t be run from a network drive.
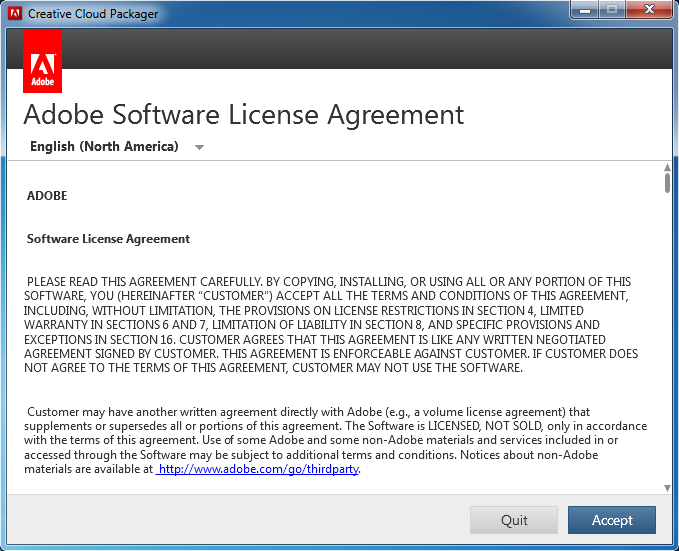
- Accept the EULA.
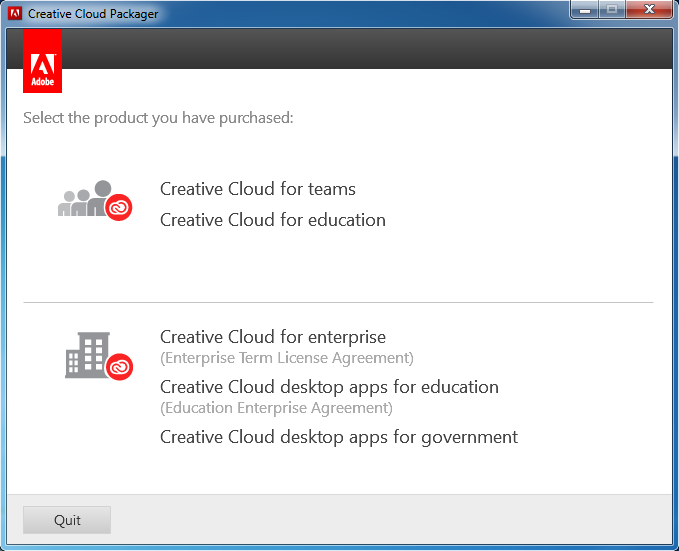
- Select which product you’ve purchased. Dutch SLBdiensten customers who’ve purchased an Adobe Fixed Price contract must select Creative Cloud desktop apps for education.
- Login with your Adobe ID and click Next.

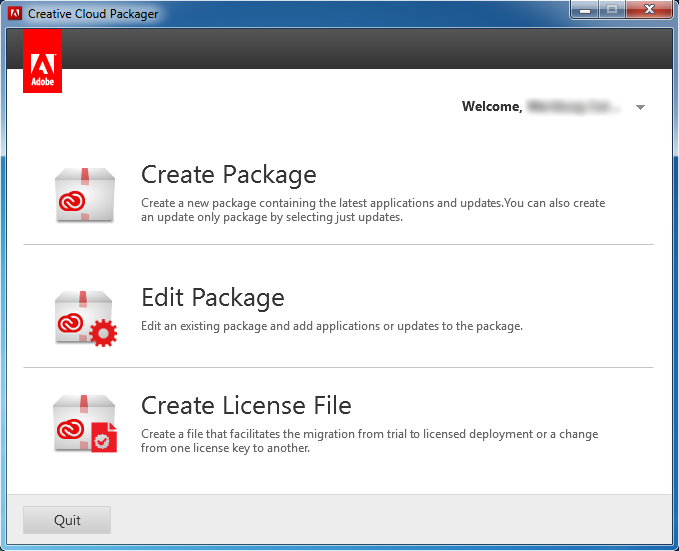
- Select Create Package and click Next.
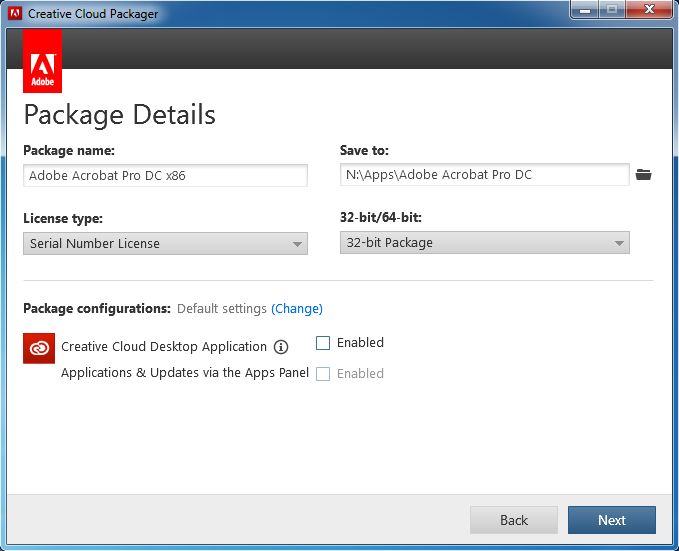
- In the Package Details screen:
- Provide a valid package name and a save path.
- In License type, enterprise customers have to select Serial Number License.
- Disable the Creative Cloud Desktop Application and Applications & Updates via the Apps Panel options.
- Click Next.
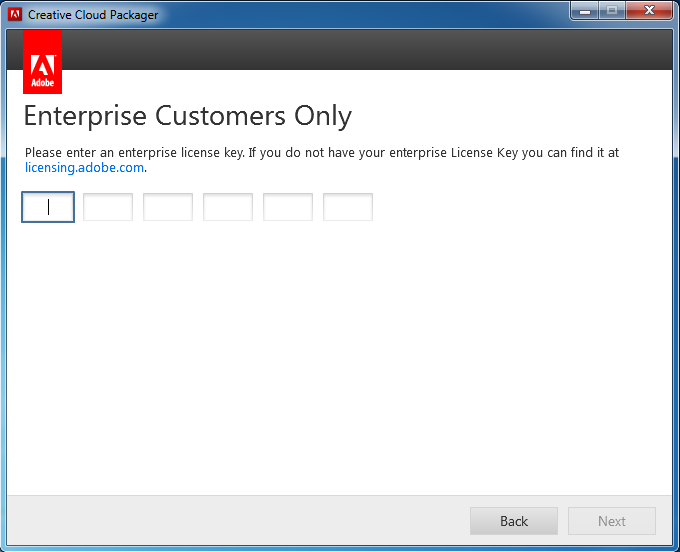
- In the next window that opens, provide your enterprise license key and click Next.
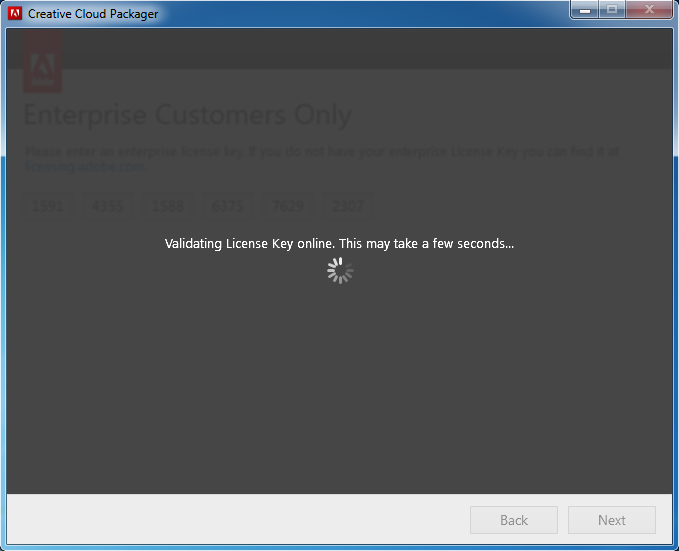
Your enterprise license key will be validated:
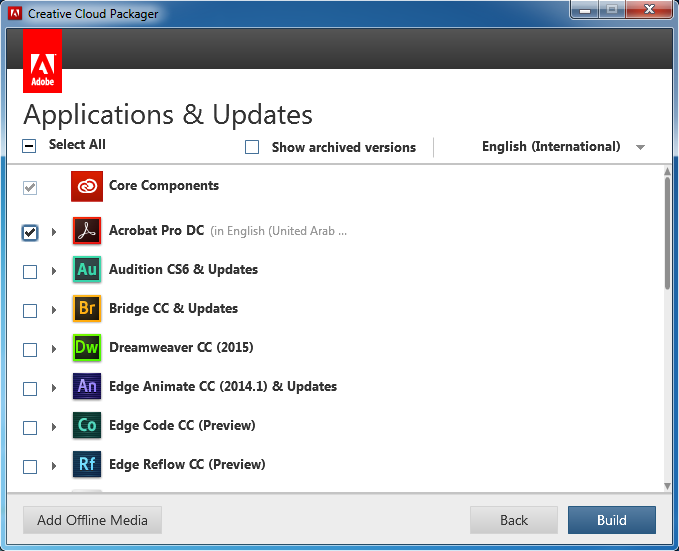
- Select your language and the components and applications you like to include in your package. In this example, we choose Adobe Acrobat DC only. After you finish your selection, click Build.
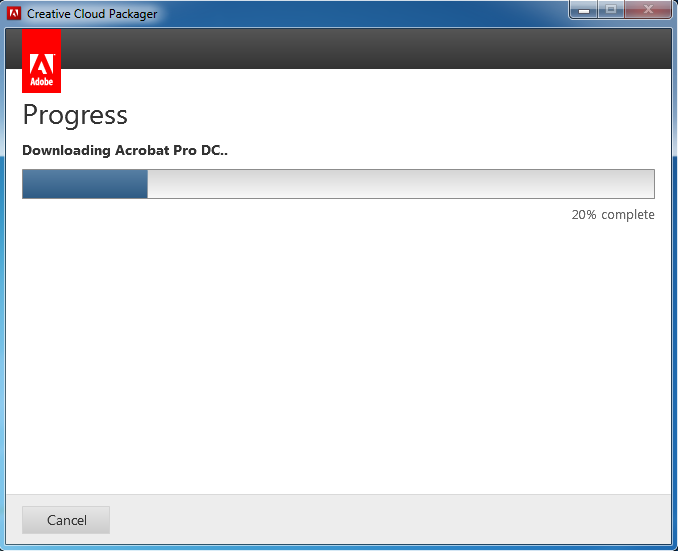
The Creative Cloud Packager will download the selected components and applications from the Adobe website and create the package.
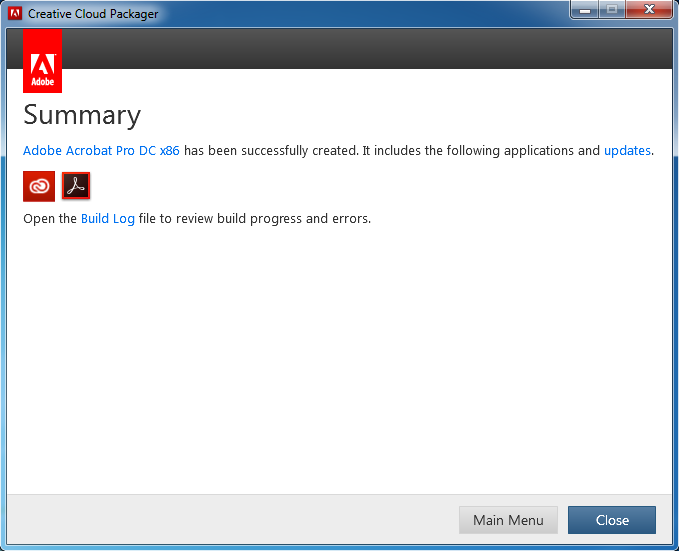
- In the Summary screen, click Close.
Create an application using Setup Commander
The files available in the folder where you downloaded them are:
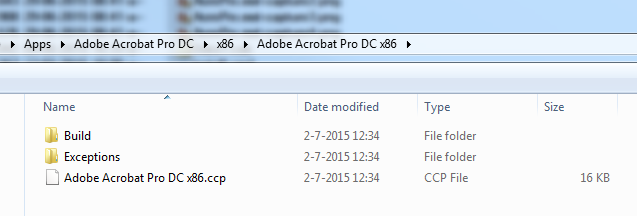
The main MSI setup is in ..\Exceptions\APRO15.0nl_NL\Adobe Acrobat\AcroPro.msi
- Open the Setup Commander and select this .MSI to create and configure a transform file using the ‘Adobe Customization Wizard’.
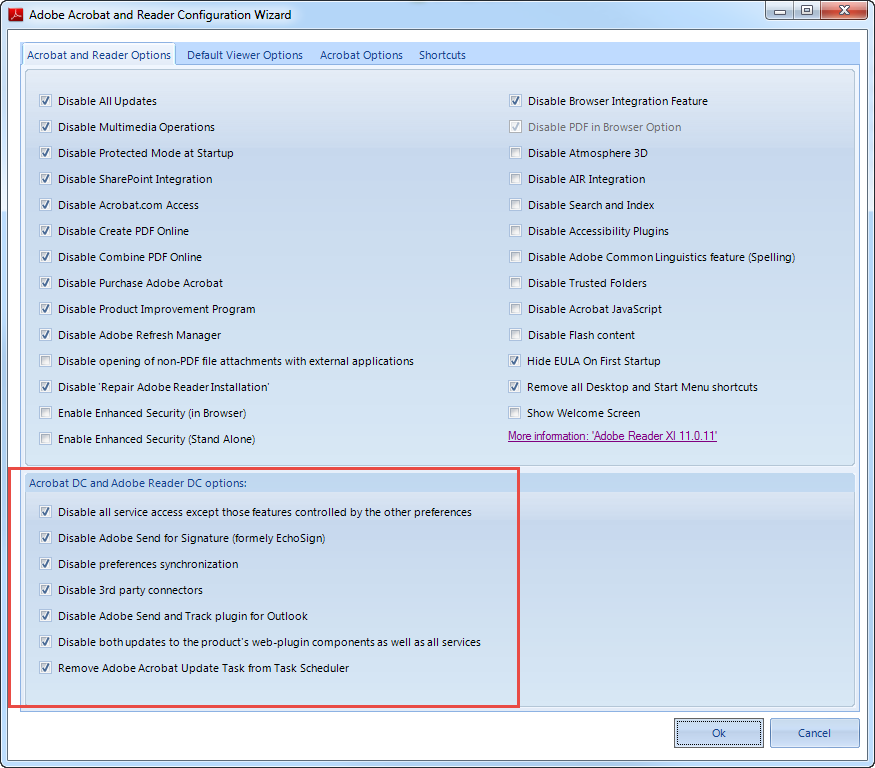
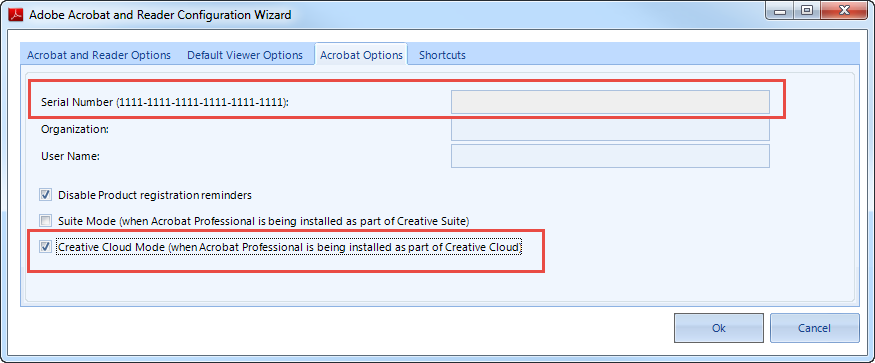
- Since Adobe Acrobat Pro DC is installed as part of Creative Cloud, select the Creative Cloud Mode checkbox. This will disable the ‘Serial Number’ textbox, as a serial number license is not needed since the ‘Enterprise license’ has been included in the ‘Package’. Then click OK.
- Create an application:
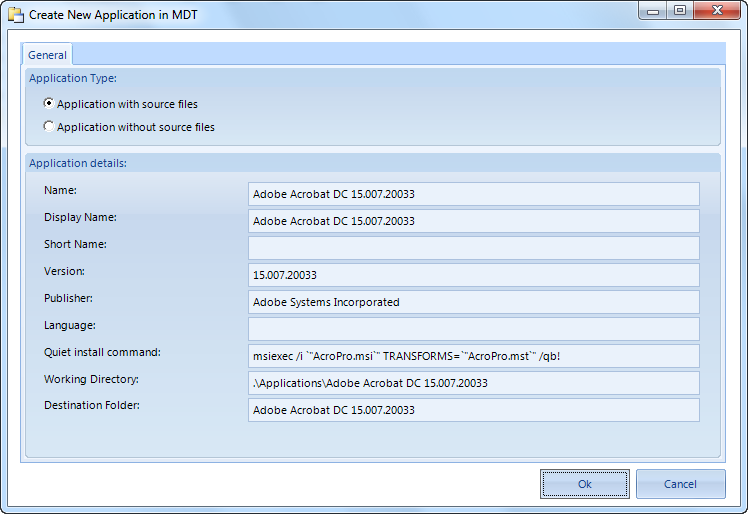
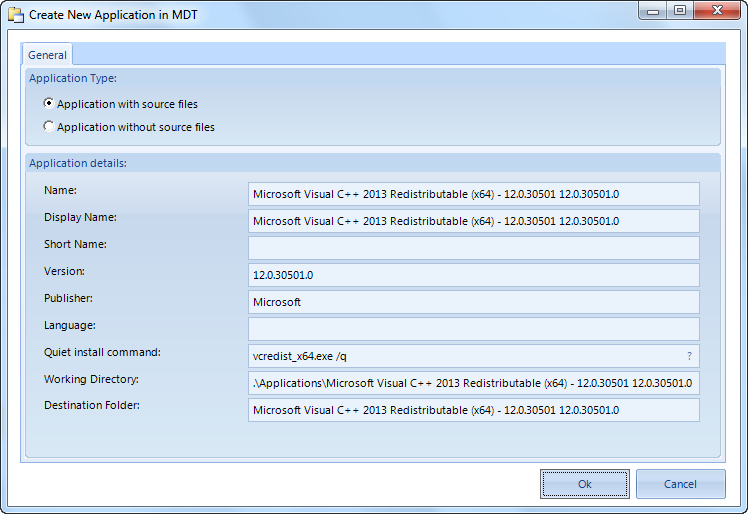
Install Microsoft Visual C++ 2013 stand-alone
To deploy ‘AcroPro.msi’, you need to have ‘Microsoft Visual C++ 2013’ installed first. Although the ‘Exceptions’ folder contains a ‘vc_runtimeMinimum_x64.msi’ which can be used to install this prerequisite, it needs some tweaking to be installed stand-alone.
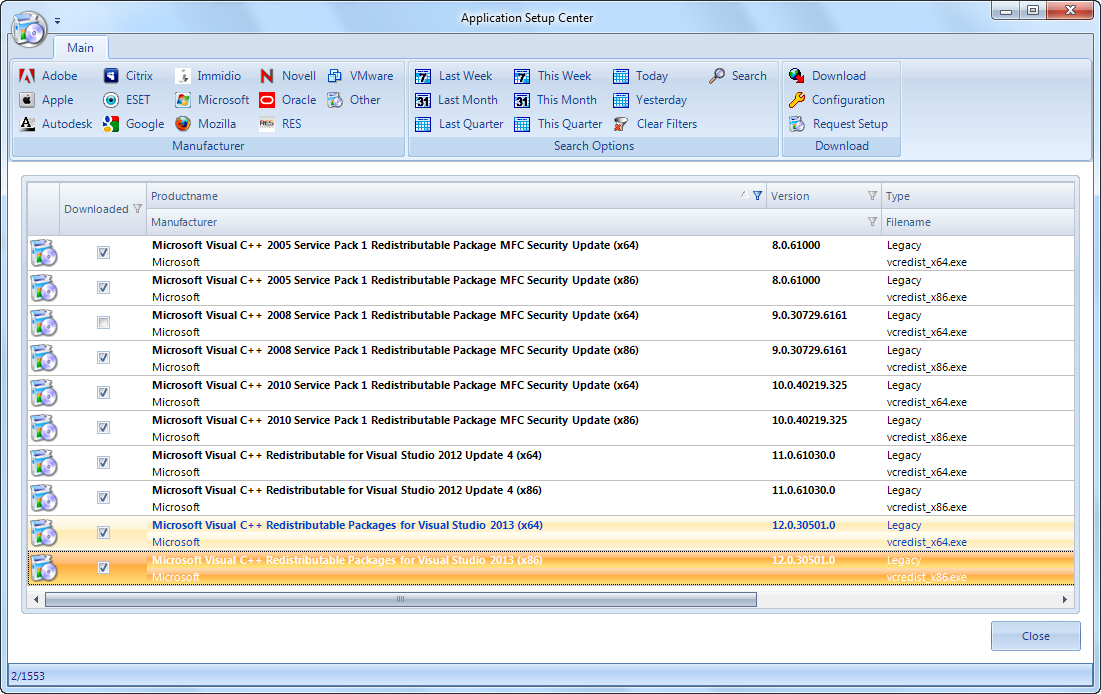
- Download the latest VC++ Runtimes for the x86 and x64 platforms from Application Workspace Setup Store and use those:
- Then create an Application for this setup:
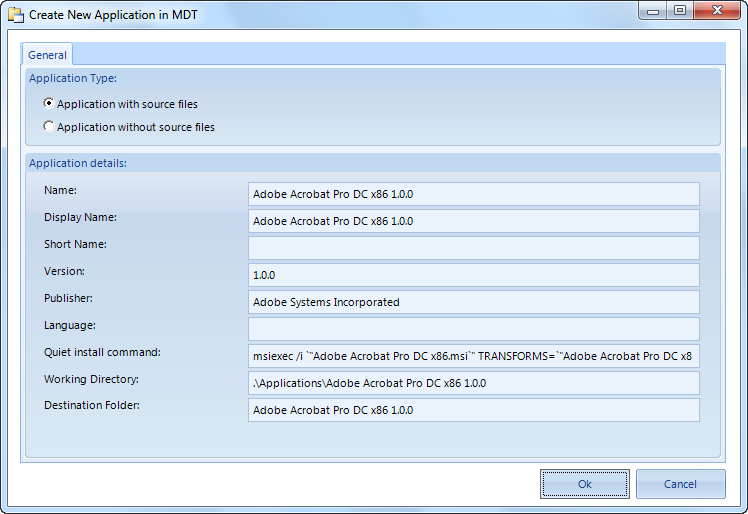
- Create an application for
..\Adobe Pro DC\Build\Adobe Pro DC.msiand make sure you select the Application with source files option.
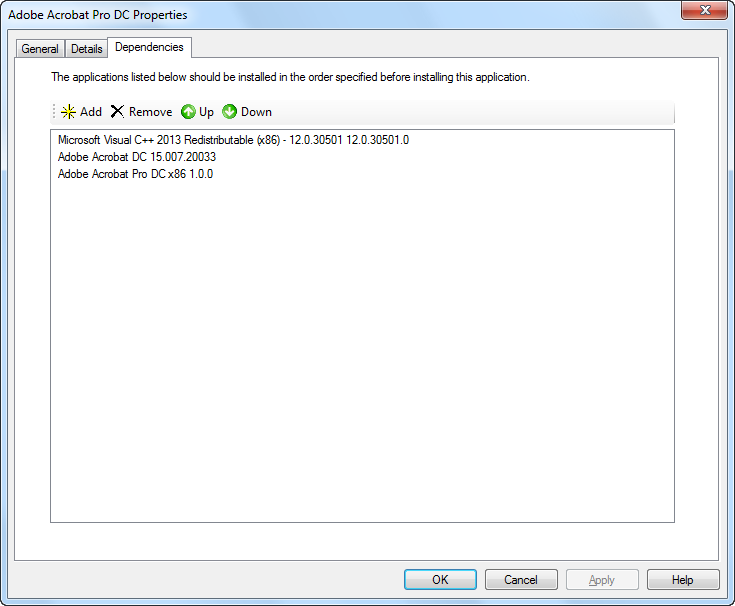
In MDT you can create an Application bundle with the 3 MSIs, using the following order:
- Microsoft Visual C++ 2013
- AcroPro.msi
- Adobe Pro DC.msi