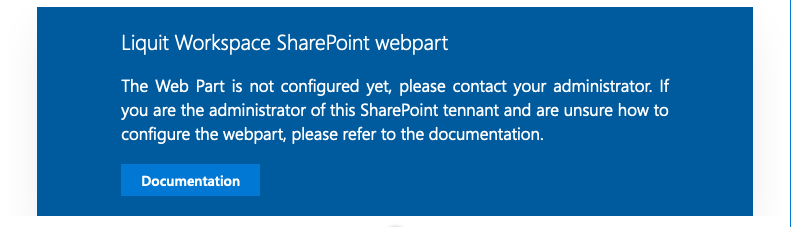
When you add the Application Workspace SharePoint webpart for the first time to your SharePoint Workspace, the following screen will be shown:
To make changes to the SharePoint webpart you need to edit it. To do this, hover over the Application Workspace SharePoint webpart and click on the  pencil icon.
The following property pane will be displayed.

Settings
| Name | Description | Pane | Default value |
|---|---|---|---|
| Zone | The FQDN on which the targeted Application Workspace zone can be found (e.g. workspace.recastsoftware.com) | Connection | |
| Identity source | The identity source needed to authenticate. You need to select a shared identity source for this. If you have for example Microsoft Entra ID (Azure AD) setup this would be an ideal choice. The name should correspond with the name in Application Workspace. | Connection | |
| Title | An optional title to be shown above the Application Workspace Microsoft SharePoint webpart. When you use a “Classic” SharePoint page to display the webpart, Microsoft SharePoint will automatically prepend the word "Webpart" to the “Application Workspace” title. | Layout | |
| Show title | if enabled, the configured title will be displayed. | Layout | Off |
| Show | This dropdown allows you to select the desired view. You can switch between a catalog or workspace view. | Layout | Workspace |
| Icon Size | Allows you to select the desired icon size:
|
Layout | Small |
| Sorting | Allows you to set the default sorting:
|
Layout | No sorting |
| Show apps as tiles | If enabled, the application icons will be rendered as tiles. | Layout | Off |
| Theme | Allows you to select your desired SharePoint site theme:
|
Layout | Light theme |
| Filters | Defines whether or not filters should be displayed in the Application Workspace Microsoft SharePoint webpart. | Filters | On |
| Use pop up authentication | This enables the popup authentication, which should be used when an Application Workspace session cannot be guaranteed. | Advanced | Off |
Security settings
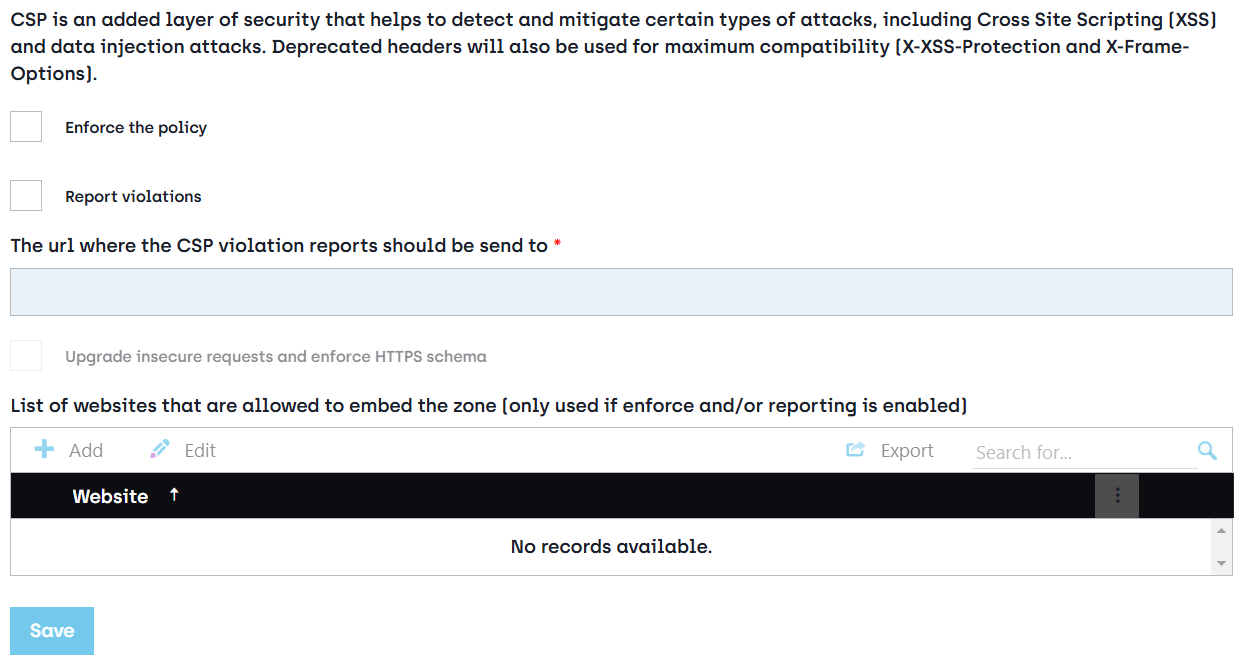
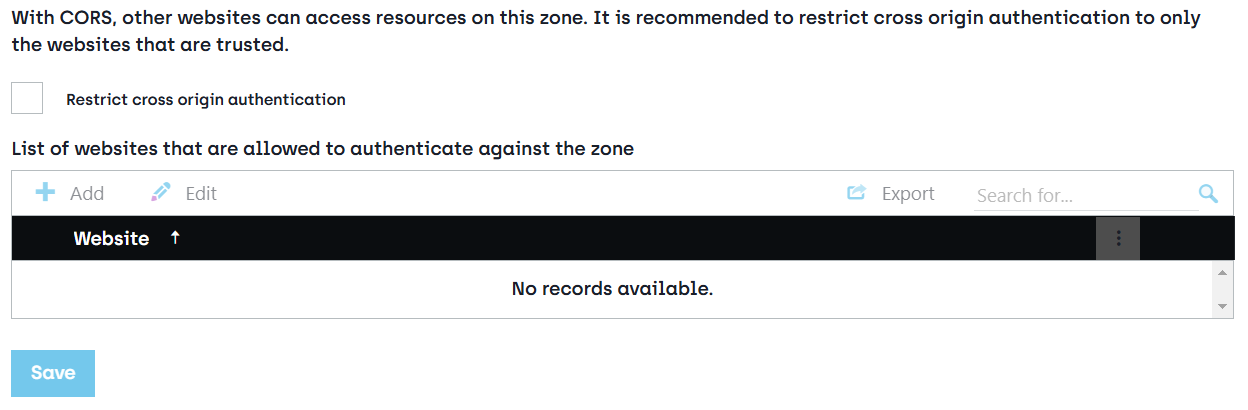
If you enable Content Security Policy (CSP) and/or Cross-Origin Resource Sharing for your Application Workspace zone, it is important that you add the entries listed below to the websites. This will ensure that Microsoft SharePoint is able to communicate with your Application Workspace zone.
[your SharePoint tenant]-*.sharepoint.com
If you want to more be specific you can enhance this even further:
[your SharePoint tenant]-[app-id].sharepoint.com
Viva Connections
It is also possible to integrate the SharePoint web part with Viva Connections. You can do this by setting up Viva Connections and adding the Application Workspace SharePoint webpart to the chosen page.