Application Workspace certificate and IdP configuration
Create a Self signed certificate
First, we need a self-signed certificate to sign the SAML 2.0 message that the Application Workspace identity provider will issue.
- Navigate to Manage > System > Certificate and click
 Create in the table toolbar.
 - In the Create certificate dialog box:
- In Type, select Self signed and click Next.
- In Overview, enter a description like “Certificate used for signing SAML messages” and click Next.
- In Self signed, for the Common name field, the domain name does not need to be a valid one. A common name like "liquit-idp" should be sufficient in most situations. In the Days valid and Key size fields leave the default values.
Create a SAML 2.0 identity provider
Now we can create a new identity provider:
-
Navigate to Manage > Authentication > Identity Providers and click
Create in the table toolbar. -
In the Create identity provider dialog box:
- In Type, select SAML 2.0 and click Next.
- In Overview, give your SAML 2.0 IdP a name (e.g., SAML IDP, this name is only used within the Application Workspace UI) and a description and click Next.
- In Summary, leave the checkbox Modify identity provider after creation selected and click Finish.
-
In the new identity provider, navigate to the Settings screen.
-
Under Certificate used for signing SAML messages select the self-signed certificate you previously created.
-
Write down the Metadata URL as you will need it later, during the configuration of Dizzion Frame.
-
Navigate to the Profiles screen and create a new profile.

-
Create the following attributes in the new profile. Note that the values of all parameters are case-sensitive.
frame_logout_url
This attribute integrates Frame Logout with Application Workspace Logout.
| Name | Value |
|---|---|
| Type | Static Value |
| Name | frame_logout_url |
| Name Format | Unspecified format |
| Friendly name | frame_logout_url |
| Value | <workspace URL>/logout.html (e.g., https://workspace.recastsoftware.com/logout.html) |
Givenname
| NameName | Value |
|---|---|
| Type | User attribute |
| Name | givenName |
| Name Format | Custom format |
| Name Format Uri | urn:mace:dir:attribute-def:givenName |
| Friendly name | givenName |
| Attribute | User display name |
Groups
| Name | Value |
|---|---|
| Type | User attribute |
| Name | groups |
| Name Format | Unspecified format |
| Friendly name | groups |
| Attribute | User membership |
| Name | Value |
|---|---|
| Type | User attribute |
| Name | |
| Name Format | Custom format |
| Name Format Uri | urn:mace:dir:attribute-def:mail |
| Friendly name | |
| Attribute | User mail |
Dizzion Frame configuration
Note within Frame you’ll see SAML2, it’s the same as the Application Workspace SAML 2.0.
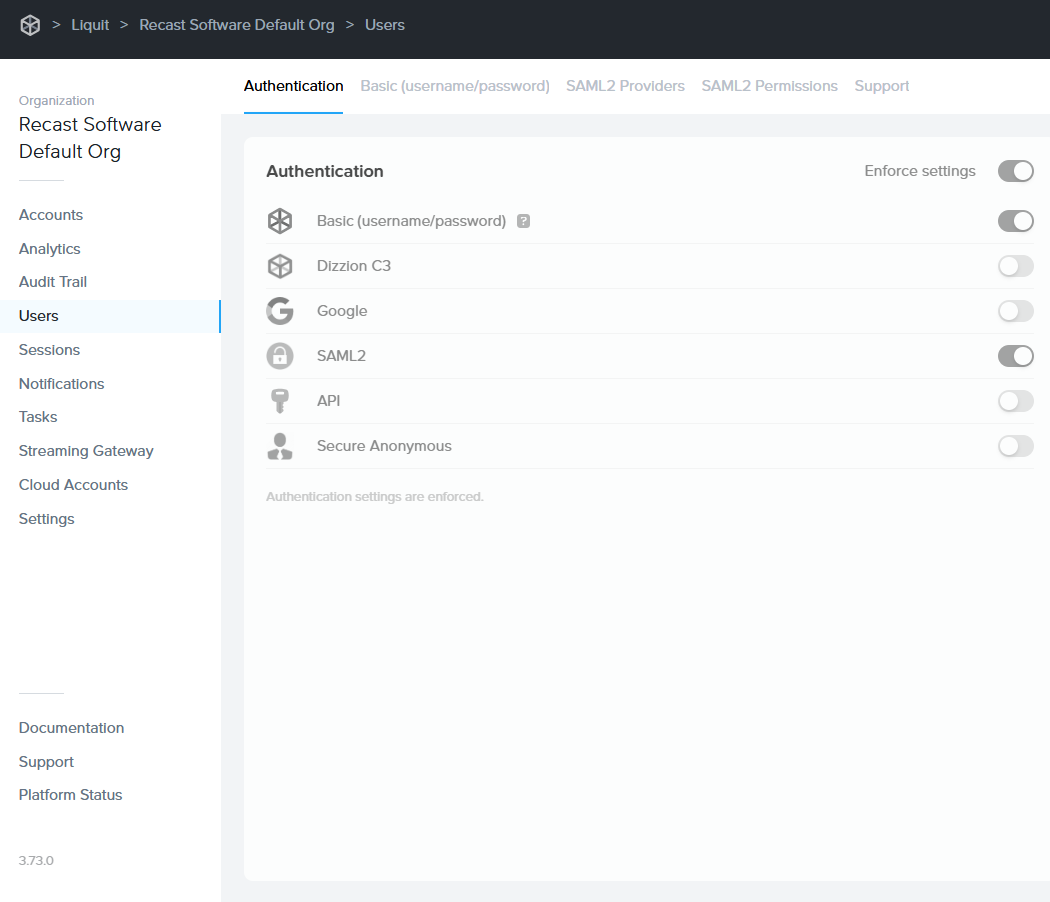
If you are attempting to set up an Identity Provider (IdP) integration, you must first navigate to the Customer entity level and unlock the Enforce settings slider.
Enable SAML2 Providers
-
Navigate to the Customer entity level > Users and unlock the Enforce settings slider. Unless there is a specific reason to do otherwise, adding the SAML2 Provider at the Customer level is best practice.
-
Click Save.
-
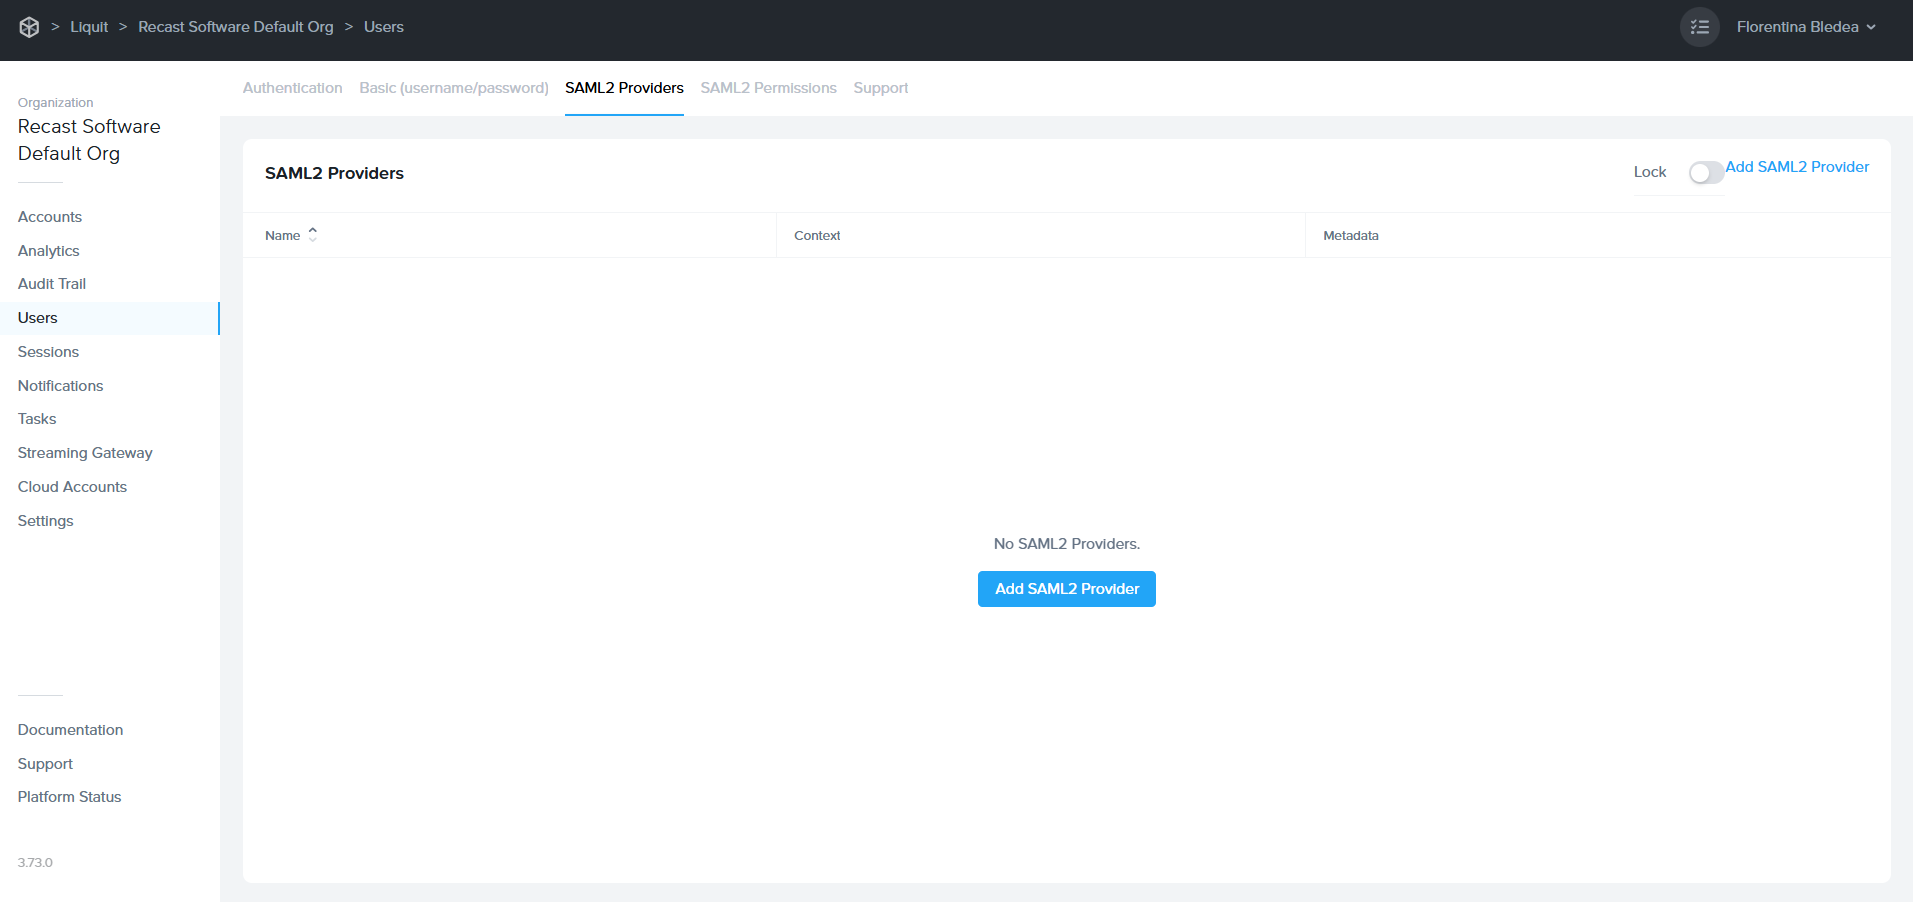
Once the setting is saved, the SAML2 Providers tab will appear and you can add a new SAML2 identity provider.
Create a SAML2 Provider
- In the SAML2 Providers, click Add SAML2 Provider.
- In the Add SAML2 Identity Provider that opens, configure the following:
- Application Id: A unique URL like your Frame console URL. This value will be used by Application Workspace to identify the Frame web application
- Auth provider metadata: Select URL and enter the Application Workspace Metadata URL you previously wrote down, at step 5 in the Create a SAML 2.0 identity provider section.
- Integration Name: Your SAML2 Integration Name is a case-sensitive, URL-friendly, unique, and descriptive value that represents the integration between the Application Workspace SAML2 Identity Provider and Frame. Only letters, numbers, and the dash symbol are allowed. No spaces or punctuation are allowed. Write down this name as you will need it later.
- Custom Label: leave it empty
- Authentication token expiration: 8 hours
- Signed response: Enable
- Signed assertion: Disable
- Click Add.

Create a SAML2 Permission
- Navigate to the SAML2 Permissions tab and click Add permission for the provider you just configured.
- In the Create a SAML2 permission dialog box that opens, configure the following:
- For provider: Select the Integration Name you entered at step 2, in Create a SAML2 Provider.
- Allow access: Select When any condition is satisfied
- Conditions: Insert Group contains Text and the name of the desired group. Note that Application Workspace has a default group called Everyone that contains all users and device within the Application Workspace System.
- Grand roles: Select Launchpad User on Desktop or Applications
Create a Launchpad Launch link
- Navigate to Dashboard > open the Launchpad's settings menu > Advanced Integrations.
- In the Advanced Integrations dialog that opens, select the Dizzion Frame SAML2 Identity Provider you previously created.
- Copy the Launch link and name of your app or desktop as you will need them later in Application Workspace when you create a launch link.
Application Workspace service provider configuration
- In Application Workspace. navigate to the identity provider you previously created and open it.
- Navigate to the Service providers screen and click Create service provider.
- In the dialog box that opens, configure the following:
- In Type, select Import Service provider from Metadata and click Next.
- In General, enter a name, select URL as the source and insert the Dizzion Frame Metadata URL from Create a Launchpad Launch link.
- In Summary, leave the checkbox Modify service provider after creation selected and click Finish.
- In the Edit service provider dialog that opens, in the General tab, under Name identifier, next to the Attribute field, click on the browse button

- In the Edit attribute dialog box that opens, select:
- Type: User attribute
- Attribute: User mail
- Click Confirm.
Now your SAML 2.0 integration with Dizzion Frame is completed.
Create a Launch link type Application Workspace Package
- Navigate to Manage > Workspace > Packages and click Create in the table toolbar.
- In the Create package dialog box that opens:
- In Type, select Web application and click Next.
- In Web, insert the Launchpad URI you previously copied at step 3 of the Create a Launchpad Launch link section, and click Next.
- In Overview, insert the Launchpad Name in the Name field and click Next.
- In Entitlements, assign the desired identities and click Next.
- In Summary, click Finish to create the package.